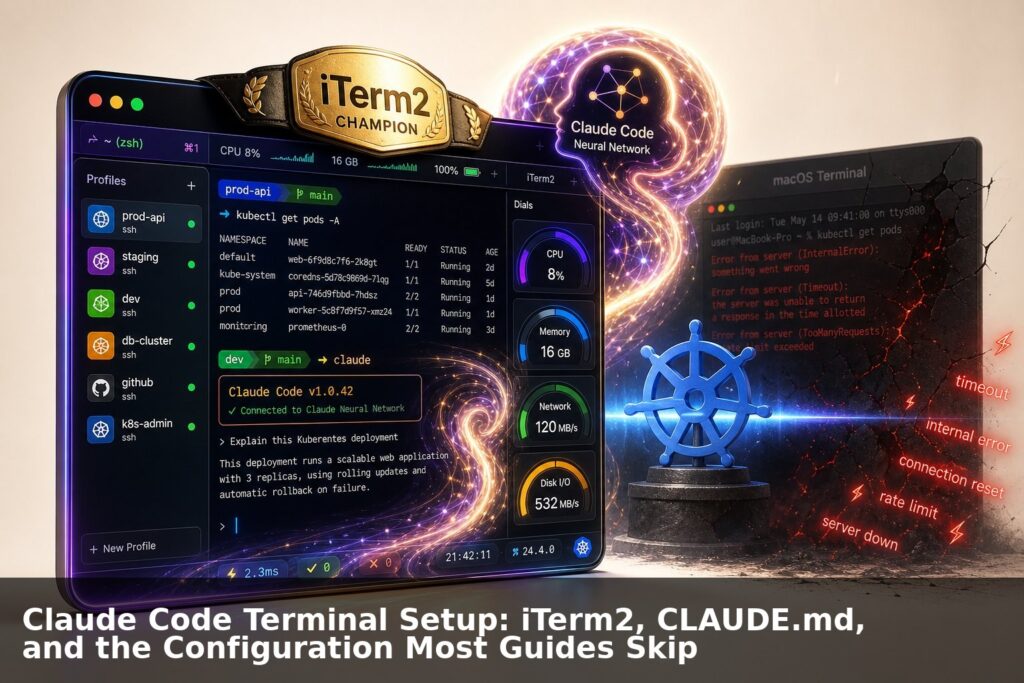
Claude Code Terminal Setup: iTerm2, CLAUDE.md, and the Configuration Most Guides Skip

Configuring Claude Code effectively starts with a properly structured terminal environment, and most guides ignore the compounding value of pairing iTerm2's profile customization with a well-crafted CLAUDE.md file. iTerm2 provides color schemes, split panes, and shell integration that reduce cognitive load during long AI-assisted sessions, while CLAUDE.md gives Claude persistent project context that survives conversation resets.
1. The terminal should not look like punishment
Most developer terminals look like they were designed by someone who believes productivity is a moral debt. Black box. Tiny text. No context. No colour discipline. No Git awareness. No visual hierarchy. No joy.
That is not just an aesthetic complaint. It is a productivity complaint. The terminal is where a lot of real engineering work still happens. It is where you run builds, tail logs, jump between repos, invoke Claude Code, fix broken deploys, SSH into machines, test APIs, and occasionally whisper threats at Kubernetes. A bad terminal hides context, makes errors harder to see, and turns long running AI coding sessions into a wall of undifferentiated noise.
This article fixes that. You will get a one shot Mac installer that configures iTerm2 properly, and a serious treatment of how to configure Claude Code as a first-class terminal citizen. Not a fragile twenty step tutorial. Not “now open preferences and click twelve things.” One script, a restart, and you have a modern console. Then we go deep on what actually makes Claude Code productive in a terminal environment: CLAUDE.md, project settings, permission models, and workflow defaults that the official docs bury or skip entirely.
The script installs and configures Homebrew if missing, iTerm2, Zsh tooling, Oh My Zsh, Powerlevel10k, popular Zsh plugins, Nerd Fonts, and twenty iTerm2 dynamic profiles. Then this article explains how to make Claude Code actually useful in that environment, which is the part most setup guides never touch.
2. What the defaults get wrong
Before running anything, it is worth naming the specific failures of a stock Mac terminal setup, because understanding them tells you why each decision in the script exists.
The default macOS Terminal.app is not a professional tool. It lacks split panes, proper colour depth, GPU rendering, dynamic profiles, and any reasonable plugin ecosystem. The only reason to use it is inertia.
Oh My Zsh is slow by default. It is notoriously heavy, and stacking zsh-syntax-highlighting on top makes cold shell startup visibly sluggish. Powerlevel10k’s instant prompt feature mitigates most of this, but the article you read in 2019 that told you to install Oh My Zsh probably did not mention that time zsh -i -c exit is how you measure the damage, and that startup times above 500ms are a sign something is wrong.
The Homebrew cask-fonts tap is deprecated. The homebrew/cask-fonts tap was folded into the main Homebrew cask repository in 2023. Scripts that run brew tap homebrew/cask-fonts will print a deprecation warning or fail silently on current Homebrew. Because most scripts suppress errors on that line with || true, the user gets no font, gets broken glyphs, and has no idea why. The fix is to install Nerd Fonts directly via brew install --cask font-meslo-lg-nerd-font without the tap step.
Claude Code aliases without permission model understanding are just noise. An alias called claude-yolo is funny until someone runs it on a codebase they did not mean to modify. The --dangerously-skip-permissions flag bypasses Claude Code’s tool confirmation prompts entirely. You need to understand what you are skipping before you skip it.
A CLAUDE.md file is not optional if you want Claude Code to be useful. Without one, Claude Code has no project context, no constraints, no preferences, and no memory of what kind of codebase it is working in. It will make sensible but generic decisions. With a good CLAUDE.md it will make contextually correct decisions. This is the highest leverage thing in this entire article and it gets less attention than font selection in most setup guides.
3. The one shot installer
Copy this entire block into your current Mac terminal and run it. The script is idempotent. Running it twice will not break anything.
cat < pimp-iterm-mac.sh
#!/usr/bin/env bash
set -euo pipefail
###############################################################################
# Pimp iTerm on Mac: Definitive Edition
# One shot iTerm2, Oh My Zsh, Powerlevel10k and profile installer.
#
# Usage:
#   ./pimp-iterm-mac.sh
#
# Optional configuration:
#   LOOK="Claude Calm" ./pimp-iterm-mac.sh
#   INSTALL_BREW="yes" INSTALL_ITERM="yes" SET_DEFAULT_SHELL="no" ./pimp-iterm-mac.sh
#
# Available looks:
#   Claude Calm | Midnight Operator | Solarized Dark Pro | Solarized Light Pro
#   Nord Engineer | Gruvbox Cave | Tokyo Night | Catppuccin Macchiato
#   Dracula Classic | Matrix Green | AWS Console | Capitec Blue Sky
#   Minimal Mono | Cyber Amber | Paper Terminal | Oceanic Next
#   Ruby Neon | Forest Ops | Monochrome Pro | Incident Room
###############################################################################
LOOK="${LOOK:-Claude Calm}"
INSTALL_BREW="${INSTALL_BREW:-yes}"
INSTALL_ITERM="${INSTALL_ITERM:-yes}"
INSTALL_OHMYZSH="${INSTALL_OHMYZSH:-yes}"
SET_DEFAULT_SHELL="${SET_DEFAULT_SHELL:-no}"
BACKUP_EXISTING="${BACKUP_EXISTING:-yes}"
FONT_CASK="${FONT_CASK:-font-meslo-lg-nerd-font}"
ZSH_CUSTOM="${ZSH_CUSTOM:-$HOME/.oh-my-zsh/custom}"
DYNAMIC_PROFILE_DIR="$HOME/Library/Application Support/iTerm2/DynamicProfiles"
PROFILE_FILE="$DYNAMIC_PROFILE_DIR/pimped-iterm-profiles.json"

info()  { printf "\033[1;36m[info]\033[0m %s\n" "$*"; }
warn()  { printf "\033[1;33m[warn]\033[0m %s\n" "$*"; }
die()   { printf "\033[1;31m[error]\033[0m %s\n" "$*"; exit 1; }

require_macos() {
  [[ "$(uname -s)" == "Darwin" ]] || die "This script is for macOS only."
}

install_homebrew_if_needed() {
  if command -v brew >/dev/null 2>&1; then
    info "Homebrew already installed."
    return
  fi
  [[ "$INSTALL_BREW" == "yes" ]] || die "Homebrew is missing and INSTALL_BREW is not yes."
  info "Installing Homebrew."
  NONINTERACTIVE=1 /bin/bash -c "$(curl -fsSL https://raw.githubusercontent.com/Homebrew/install/HEAD/install.sh)"
  if [[ -x "/opt/homebrew/bin/brew" ]]; then
    eval "$(/opt/homebrew/bin/brew shellenv)"
  elif [[ -x "/usr/local/bin/brew" ]]; then
    eval "$(/usr/local/bin/brew shellenv)"
  fi
}

install_packages() {
  info "Updating Homebrew."
  brew update >/dev/null
  info "Installing CLI tools."
  brew install git curl zsh jq fzf zoxide eza bat ripgrep fd tree wget >/dev/null || true

  # Do NOT tap homebrew/cask-fonts. It was folded into homebrew/cask in 2023.
  # Install Nerd Fonts directly.
  info "Installing Nerd Font: $FONT_CASK"
  brew install --cask "$FONT_CASK" >/dev/null 2>&1 || warn "Font install failed. Check font cask name."

  if [[ "$INSTALL_ITERM" == "yes" ]]; then
    info "Installing iTerm2."
    brew install --cask iterm2 >/dev/null 2>&1 || true
  fi
}

install_ohmyzsh() {
  if [[ "$INSTALL_OHMYZSH" != "yes" ]]; then
    warn "Skipping Oh My Zsh install."
    return
  fi
  if [[ -d "$HOME/.oh-my-zsh" ]]; then
    info "Oh My Zsh already installed."
    return
  fi
  info "Installing Oh My Zsh (unattended)."
  RUNZSH=no CHSH=no KEEP_ZSHRC=yes sh -c \
    "$(curl -fsSL https://raw.githubusercontent.com/ohmyzsh/ohmyzsh/master/tools/install.sh)" \
    "" --unattended
}

install_zsh_plugins() {
  mkdir -p "$ZSH_CUSTOM/plugins" "$ZSH_CUSTOM/themes"

  if [[ ! -d "$ZSH_CUSTOM/themes/powerlevel10k" ]]; then
    info "Installing Powerlevel10k."
    git clone --depth=1 https://github.com/romkatv/powerlevel10k.git \
      "$ZSH_CUSTOM/themes/powerlevel10k"
  else
    info "Powerlevel10k already installed."
  fi

  local plugins=(
    "zsh-autosuggestions:https://github.com/zsh-users/zsh-autosuggestions"
    "zsh-syntax-highlighting:https://github.com/zsh-users/zsh-syntax-highlighting.git"
    "zsh-completions:https://github.com/zsh-users/zsh-completions"
  )
  for entry in "${plugins[@]}"; do
    local name="${entry%%:*}"
    local url="${entry##*:}"
    if [[ ! -d "$ZSH_CUSTOM/plugins/$name" ]]; then
      info "Installing $name."
      git clone --depth=1 "$url" "$ZSH_CUSTOM/plugins/$name"
    fi
  done
}

backup_file() {
  local file="$1"
  if [[ -f "$file" && "$BACKUP_EXISTING" == "yes" ]]; then
    cp "$file" "$file.backup.$(date +%Y%m%d%H%M%S)"
    info "Backed up $file."
  fi
}

write_zshrc() {
  backup_file "$HOME/.zshrc"
  info "Writing ~/.zshrc."
  cat > "$HOME/.zshrc" < "$HOME/.p10k.zsh" < "$PROFILE_FILE" </dev/null
  fi
  info "Changing default shell to $zsh_path."
  chsh -s "$zsh_path"
}

open_iterm() {
  if [[ -d "/Applications/iTerm.app" ]]; then
    info "Opening iTerm2."
    open -a iTerm || true
  fi
}

final_message() {
  cat < Set as Default" if you want it permanent.

For Claude Code sessions, use: Claude Calm, Minimal Mono, or Paper Terminal.

To measure your shell startup time:
  time zsh -i -c exit

Useful aliases now active:
  ll              icon directory listing
  gs              short git status
  gl              compact git log graph
  cc              claude (with prompts)
  claude-yolo     claude --dangerously-skip-permissions (read the article first)
  zreload         reload ~/.zshrc

Next step: read section 6 of the article on CLAUDE.md before starting a Claude Code session.
MSG
}

main() {
  require_macos
  install_homebrew_if_needed
  install_packages
  install_ohmyzsh
  install_zsh_plugins
  write_zshrc
  write_p10k_config
  write_iterm_profiles
  set_default_shell_if_requested
  open_iterm
  final_message
}

main "$@"
EOF
chmod +x pimp-iterm-mac.sh
./pimp-iterm-mac.sh
4. The twenty profiles and when to use each
The installer creates all twenty profiles regardless of which look you pick. The LOOK variable only controls which one the final message recommends. You can switch freely in iTerm2 Settings → Profiles.
Here is an honest guide to each one rather than just a name:
Claude Calm is the default and the most considered profile in the set. High contrast foreground, near-black background, a blue cursor that sits visually apart from text, 132 columns wide. Designed for the kind of session where Claude Code is generating diffs, proposing file edits, and producing long output. The wrong theme turns that into confetti. This one does not.
Midnight Operator is a classic dark terminal for engineers who want nothing fancy. Good for late night work when you want the screen to disappear except for what matters.
Solarized Dark Pro and Solarized Light Pro are the Solarized palette done properly. Solarized has been around since 2011 because it is genuinely good for long sessions. The contrast ratios are calculated, not guessed. If you are not sure what you want, start here.
Nord Engineer uses the Nord palette, which is a cool blue-grey that feels calm and modern. Popular in the VS Code world. Works well if your editor and terminal share a palette.
Gruvbox Cave is warm and retro. Amber and orange tones on a dark brown background. Some engineers love this for its readability over long sessions. Others find it too warm. Worth trying.
Tokyo Night looks like a modern dark IDE. If you spend most of your time in VS Code with the Tokyo Night theme, this makes your terminal feel like an extension of your editor.
Catppuccin Macchiato is soft pastel dark. It looks beautiful in screenshots and is genuinely comfortable for long use. The cursor is pink which is either charming or annoying depending on your tolerance.
Dracula Classic is the purple terminal that half the internet uses. There is a reason for that. It is readable, it has good community colour support across many tools, and the contrast holds up.
Matrix Green is green on black. This is not subtle. Use it when you want to feel like you are doing something that matters. Do not use it in a meeting unless you want to explain yourself.
AWS Console is a dark blue and orange terminal styled loosely after the AWS colour palette. Good for long cloud infrastructure sessions where the visual language matches your mental model.
Capitec Blue Sky is light, clean, and high contrast. The background is nearly white with deep navy text. Good for presentations and demos where the audience needs to read your screen.
Minimal Mono has almost no colour. Greyscale foreground on near-black background. The choice for engineers who find colour themes distracting.
Cyber Amber is an old school amber phosphor console with a modern font. Purely aesthetic but very pleasant for a certain kind of work.
Paper Terminal has a light background that feels like writing on paper. Good for documentation sessions, writing heavy work, or any time you want to reduce eye strain from a bright monitor.
Oceanic Next is a deep blue theme with balanced contrast. One of the more polished options in the set.
Ruby Neon is high energy pink and red. You will know if this is for you. It is not for everyone.
Forest Ops is green-grey, operational, and calm. Not Matrix green. A real working green.
Monochrome Pro is almost boring and that is the point. The most restrained theme in the set. When you genuinely just want to work.
Incident Room uses a 15pt font and 140 columns, and has a red cursor on a near-black background. For production debugging sessions when you need everything slightly larger and more visible. The red cursor is intentional. It keeps you mentally in incident mode.
5. What the script changes and where to find it
The script writes three things on disk:
~/.zshrc is your Zsh configuration: Oh My Zsh plugins, modern CLI aliases, history settings, Git shortcuts, Claude Code aliases, and zoxide initialisation. If you already have a ~/.zshrc, the script backs it up with a timestamp before overwriting.
~/.p10k.zsh is the Powerlevel10k prompt configuration. The script writes a functional default that skips the interactive wizard. If you want to run the full configuration wizard later, run p10k configure. The written config includes AWS profile, Node version, and Python version in the right prompt, shown only when relevant.
~/Library/Application Support/iTerm2/DynamicProfiles/pimped-iterm-profiles.json is where the twenty profile definitions live. iTerm2 Dynamic Profiles are loaded from this directory at startup, outside the standard macOS preferences database. This is the correct mechanism for distributing and managing iTerm2 profiles programmatically. You can edit this file directly, delete profiles you will never use, or add your own.
6. Claude Code as a terminal citizen: the part most guides skip
The shell environment is fine. This is where it gets interesting.
Claude Code is not like a normal CLI tool. It reads files, writes files, runs shell commands, executes tests, searches your codebase, and modifies code on your behalf. The terminal is not just a place you invoke it from. It is the environment it operates in. How you configure that environment determines whether Claude Code is a precision instrument or a blunt one.
There are three things that matter: the permission model, the CLAUDE.md file, and the project-level settings in .claude/settings.json. Most people set up none of them.
6.1 The permission model
Claude Code has a permission system that controls what it can do without asking you first. By default, it prompts you before running shell commands, writing files, and using most tools. This is the right default. It is not annoying. It is a checkpoint.
The --dangerously-skip-permissions flag removes all prompts. Claude Code will run commands, write files, and execute anything it decides is appropriate without asking. There are legitimate uses for this: CI pipelines, sandboxed Docker containers, throwaway codebases where you genuinely do not care about the output being destructive. There are also a lot of situations where engineers reach for it because the prompts feel slow, and then regret it.
The claude-yolo alias in this setup is there for when you know what you are doing. Not for when you are impatient. The distinction matters.
For unfamiliar codebases or anything involving production configuration, infrastructure definitions, or environment files, run plain claude with prompts enabled. The checkpoint is the feature.
6.2 CLAUDE.md: the highest leverage configuration file you are probably not using
CLAUDE.md is a Markdown file that Claude Code reads at the start of every session. It is project context, constraints, preferences, and working agreements in one file. Without it, Claude Code makes generic decisions. With a good one, it makes contextually correct ones.
There are two levels. A project-level CLAUDE.md lives at the root of your repository and applies to that project. A global ~/.claude/CLAUDE.md applies to every Claude Code session on your machine. Both are loaded if both exist.
Here is a strong template for a project-level CLAUDE.md:
# Project context

This is a [brief description: e.g. "Node.js REST API for payment processing"].
Primary language: [e.g. TypeScript].
Runtime: [e.g. Node 20 on AWS Lambda].
Infrastructure: [e.g. Terraform, deployed to us-east-1].

# Code standards

- Use async/await. No callbacks.
- Error handling must be explicit. Do not swallow errors silently.
- All new functions need JSDoc comments.
- Tests live in __tests__/ and follow the existing naming convention.
- Do not add new dependencies without asking first.

# What to avoid

- Do not modify .env files under any circumstances.
- Do not refactor existing working code unless asked.
- Do not add logging to production code paths without asking.
- Do not change package.json scripts.

# Testing

Run tests with: npm test
Lint with: npm run lint
Type check with: npm run typecheck

# Branch conventions

Feature branches: feature/short-description
Fix branches: fix/short-description
Never commit directly to main.

# Things Claude should know about this codebase

[Add any architectural decisions, known quirks, deprecated patterns to avoid,
or domain-specific knowledge that would help a new engineer. Claude reads this
at the start of every session. Treat it like the onboarding document you wish
existed.]
The “things Claude should know” section is the most valuable. If your codebase has a weird authentication flow, an undocumented external dependency, a legacy module that must not be touched, or a performance constraint that is not obvious from the code, write it here. You write it once. It applies to every session.
Here is a global ~/.claude/CLAUDE.md template for your machine:
# Global preferences

I am an experienced engineer. Do not over-explain basic concepts.
Be direct. Show the code first, explain after if needed.
When in doubt about scope, ask before doing.

# Shell environment

macOS with Zsh and Oh My Zsh.
Package management: Homebrew.
Primary editor: [your preference].
Infrastructure tooling: Terraform, AWS CDK.

# Response preferences

- Prefer concrete examples over abstract explanations.
- If you are uncertain about something, say so rather than guessing.
- When showing code changes, show a unified diff or the full function, not fragments.
- Do not add TODO comments to code. Either implement it or flag it in your response.

# Things I do not want

- Do not add console.log or print statements to code unless I ask.
- Do not suggest adding telemetry or monitoring unless I ask.
- Do not propose refactoring working code unless I specifically ask for a refactor.
The global file is for working preferences that apply everywhere. Project files are for project-specific constraints. Both are loaded. Neither requires any special command to activate. Claude Code reads them automatically.
6.3 Project settings in .claude/settings.json
Claude Code supports a project-level settings file at .claude/settings.json. This controls which tools are allowed, what permission level applies, and can set model preferences for the project. The file should be committed to source control.
A practical starting configuration:
{
  "permissions": {
    "allow": [
      "Read",
      "Write",
      "Bash(git *)",
      "Bash(npm run *)",
      "Bash(npm test)",
      "Bash(npm run lint)",
      "Bash(npm run typecheck)"
    ],
    "deny": [
      "Bash(rm -rf *)",
      "Bash(git push *)",
      "Bash(git commit *)"
    ]
  }
}
This setup allows Claude Code to read and write files, run Git read commands, and execute your standard npm scripts. It blocks destructive shell commands and Git write operations. Claude Code will still ask for confirmation on anything not in the allow list. The deny list is enforced without prompting.
For infrastructure repositories with Terraform, add "Bash(terraform plan)" to the allow list and keep "Bash(terraform apply *)" in the deny list. Plan without prompt, apply always prompts. That is a sensible boundary.
The .claude/ directory should be in your .gitignore for anything that contains personal preferences, or committed as shared team configuration if you want consistent Claude Code behaviour across a team. That is a deliberate choice, not a default.
7. Backing up and restoring your configuration
Run the backup script immediately after the installer finishes. Before you have spent time tuning profiles, writing a CLAUDE.md, and adjusting project permissions, there is nothing to lose. After you have done those things, losing them to a machine rebuild or an accidental overwrite is an expensive problem with a cheap solution.
The backup targets are:
~/.zshrcand~/.p10k.zsh— your shell configuration and Powerlevel10k prompt~/.zprofileand~/.zshenv— shell environment files if present~/.claude/CLAUDE.mdand~/.claude/settings.json— your global Claude Code instructions and permissions~/Library/Application Support/iTerm2/DynamicProfiles/— all twenty dynamic profiles~/Library/Preferences/com.googlecode.iterm2.plist— iTerm2 keybindings, colours, and general preferences- Any
.claude/directories found up to three levels deep under~/projects— project level Claude settings
Each backup produces a timestamped tarball in ~/claude-backups/ alongside a manifest file recording what was captured, the hostname, and the macOS version. The archive uses a HOME/ prefix internally so the restore script knows exactly where each file belongs.
7.1 The backup script
Copy and run this block. It writes the script to your current directory and makes it executable.
cat > backup-claude-terminal.sh << 'EOF'
#!/usr/bin/env bash
set -euo pipefail

###############################################################################
# backup-claude-terminal.sh
#
# Backs up Claude Code terminal configuration to a timestamped tarball.
#
# Usage:
#   ./backup-claude-terminal.sh
#   ./backup-claude-terminal.sh --dest ~/Dropbox/backups
#   ./backup-claude-terminal.sh --projects ~/code
#   ./backup-claude-terminal.sh --dry-run
#
# Options:
#   --dest DIR       Directory to write the backup tarball (default: ~/claude-backups)
#   --projects DIR   Root directory to scan for project level .claude/ folders
#                    (default: ~/projects, skipped silently if it does not exist)
#   --dry-run        Print what would be backed up without creating the archive
###############################################################################

DEST_DIR="${HOME}/claude-backups"
PROJECTS_ROOT="${HOME}/projects"
DRY_RUN="no"
TIMESTAMP="$(date +%Y%m%d%H%M%S)"
ARCHIVE_NAME="claude-terminal-backup-${TIMESTAMP}.tar.gz"
MANIFEST_NAME="claude-terminal-backup-${TIMESTAMP}.manifest.txt"

info()    { printf "\033[1;36m[backup]\033[0m %s\n" "$*"; }
warn()    { printf "\033[1;33m[backup]\033[0m %s\n" "$*"; }
success() { printf "\033[1;32m[backup]\033[0m %s\n" "$*"; }
die()     { printf "\033[1;31m[backup]\033[0m %s\n" "$*"; exit 1; }

parse_args() {
  while [[ $# -gt 0 ]]; do
    case "$1" in
      --dest)     DEST_DIR="$2";      shift 2 ;;
      --projects) PROJECTS_ROOT="$2"; shift 2 ;;
      --dry-run)  DRY_RUN="yes";      shift   ;;
      --help|-h)  grep '^#' "$0" | grep -v '#!/' | sed 's/^# \{0,2\}//'; exit 0 ;;
      *)          die "Unknown argument: $1" ;;
    esac
  done
}

collect_targets() {
  local targets=()

  local dotfiles=(
    "${HOME}/.zshrc"
    "${HOME}/.p10k.zsh"
    "${HOME}/.zprofile"
    "${HOME}/.zshenv"
  )
  for f in "${dotfiles[@]}"; do
    [[ -f "$f" ]] && targets+=("$f")
  done

  local claude_global=(
    "${HOME}/.claude/CLAUDE.md"
    "${HOME}/.claude/settings.json"
    "${HOME}/.claude/settings.local.json"
  )
  for f in "${claude_global[@]}"; do
    [[ -f "$f" ]] && targets+=("$f")
  done

  local iterm_profiles="${HOME}/Library/Application Support/iTerm2/DynamicProfiles"
  [[ -d "$iterm_profiles" ]] && targets+=("$iterm_profiles")

  local iterm_prefs="${HOME}/Library/Preferences/com.googlecode.iterm2.plist"
  [[ -f "$iterm_prefs" ]] && targets+=("$iterm_prefs")

  if [[ -d "$PROJECTS_ROOT" ]]; then
    while IFS= read -r -d '' dir; do
      targets+=("$dir")
    done < <(find "$PROJECTS_ROOT" -maxdepth 3 -type d -name ".claude" -print0 2>/dev/null)
  fi

  printf '%s\n' "${targets[@]}"
}

write_manifest() {
  local manifest_path="$1"
  shift
  local targets=("$@")
  {
    echo "Claude Code Terminal Backup"
    echo "Generated: $(date)"
    echo "Host: $(hostname)"
    echo "macOS: $(sw_vers -productVersion 2>/dev/null || echo unknown)"
    echo ""
    echo "Files and directories included:"
    for t in "${targets[@]}"; do echo "  $t"; done
  } > "$manifest_path"
}

run_backup() {
  local targets=()
  while IFS= read -r line; do targets+=("$line"); done < <(collect_targets)

  [[ ${#targets[@]} -gt 0 ]] || die "No backup targets found. Nothing to do."

  info "Backup targets:"
  for t in "${targets[@]}"; do info "  $t"; done

  if [[ "$DRY_RUN" == "yes" ]]; then
    warn "Dry run mode. No archive created."
    return
  fi

  mkdir -p "$DEST_DIR"
  local tmp_dir; tmp_dir="$(mktemp -d)"
  trap 'rm -rf "$tmp_dir"' EXIT

  local manifest_path="${tmp_dir}/${MANIFEST_NAME}"
  write_manifest "$manifest_path" "${targets[@]}"

  local archive_path="${DEST_DIR}/${ARCHIVE_NAME}"
  local stage="${tmp_dir}/stage"
  mkdir -p "$stage"
  cp "$manifest_path" "$stage/"

  for t in "${targets[@]}"; do
    local rel="HOME/${t/#${HOME}\//}"
    local dest_path="${stage}/${rel}"
    mkdir -p "$(dirname "$dest_path")"
    if [[ -d "$t" ]]; then cp -r "$t" "$dest_path"; else cp "$t" "$dest_path"; fi
  done

  tar -czf "$archive_path" -C "$stage" .
  local size; size="$(du -sh "$archive_path" | cut -f1)"
  success "Backup complete: ${archive_path} (${size})"
  info "Restore with: ./restore-claude-terminal.sh ${archive_path}"
}

main() { parse_args "$@"; run_backup; }
main "$@"
EOF
chmod +x backup-claude-terminal.sh
Run it immediately after the installer:
./backup-claude-terminal.shPass --dest ~/Dropbox/backups to write the tarball somewhere that syncs offsite. Pass --dry-run to inspect what would be captured without writing anything.
7.2 The restore script
cat > restore-claude-terminal.sh << 'EOF'
#!/usr/bin/env bash
set -euo pipefail

###############################################################################
# restore-claude-terminal.sh
#
# Restores Claude Code terminal configuration from a backup tarball produced
# by backup-claude-terminal.sh.
#
# Usage:
#   ./restore-claude-terminal.sh <archive.tar.gz>
#   ./restore-claude-terminal.sh --list <archive.tar.gz>
#   ./restore-claude-terminal.sh --dry-run <archive.tar.gz>
#   ./restore-claude-terminal.sh --force <archive.tar.gz>
#   ./restore-claude-terminal.sh --dest ~/inspect <archive.tar.gz>
#
# Options:
#   --list       Print the contents of the archive without restoring
#   --dry-run    Show what would be restored without writing any files
#   --force      Overwrite existing files without prompting
#   --dest DIR   Restore to an alternate root instead of ~ (useful for inspection)
###############################################################################

ARCHIVE=""
LIST_ONLY="no"
DRY_RUN="no"
FORCE="no"
DEST_ROOT="${HOME}"

info()    { printf "\033[1;36m[restore]\033[0m %s\n" "$*"; }
warn()    { printf "\033[1;33m[restore]\033[0m %s\n" "$*"; }
success() { printf "\033[1;32m[restore]\033[0m %s\n" "$*"; }
die()     { printf "\033[1;31m[restore]\033[0m %s\n" "$*"; exit 1; }

parse_args() {
  while [[ $# -gt 0 ]]; do
    case "$1" in
      --list)    LIST_ONLY="yes";  shift   ;;
      --dry-run) DRY_RUN="yes";    shift   ;;
      --force)   FORCE="yes";      shift   ;;
      --dest)    DEST_ROOT="$2";   shift 2 ;;
      --help|-h) grep '^#' "$0" | grep -v '#!/' | sed 's/^# \{0,2\}//'; exit 0 ;;
      -*)        die "Unknown option: $1" ;;
      *)         ARCHIVE="$1";     shift   ;;
    esac
  done
  [[ -n "$ARCHIVE" ]] || die "No archive specified. Usage: $0 [options] <archive.tar.gz>"
  [[ -f "$ARCHIVE" ]] || die "Archive not found: $ARCHIVE"
}

backup_existing() {
  local path="$1"
  if [[ -e "$path" ]]; then
    local bak="${path}.pre-restore.$(date +%Y%m%d%H%M%S)"
    cp -r "$path" "$bak"
    warn "Existing file backed up to: $bak"
  fi
}

confirm() {
  [[ "$FORCE" == "yes" ]] && return 0
  printf "%s [y/N] " "$1"
  read -r answer
  [[ "$answer" =~ ^[Yy]$ ]]
}

run_restore() {
  local tmp_dir; tmp_dir="$(mktemp -d)"
  trap 'rm -rf "$tmp_dir"' EXIT

  if [[ "$LIST_ONLY" == "yes" ]]; then
    info "Contents of ${ARCHIVE}:"
    tar -tzf "$ARCHIVE"
    return
  fi

  info "Extracting archive."
  tar -xzf "$ARCHIVE" -C "$tmp_dir"

  local manifest; manifest="$(find "$tmp_dir" -name "*.manifest.txt" 2>/dev/null | head -1)"
  if [[ -n "$manifest" ]]; then
    info "Manifest:"; cat "$manifest"; echo ""
  fi

  if [[ "$DRY_RUN" == "no" && "$FORCE" == "no" ]]; then
    warn "This will restore files from: ${ARCHIVE}"
    warn "Existing files will be backed up with a .pre-restore timestamp."
    confirm "Proceed?" || { info "Aborted."; exit 0; }
  fi

  local stage_home="${tmp_dir}/HOME"
  [[ -d "$stage_home" ]] || stage_home="$tmp_dir"

  info "Restoring to: ${DEST_ROOT}"
  while IFS= read -r -d '' staged_path; do
    local rel_path="${staged_path/#${stage_home}\//}"
    local dest_path="${DEST_ROOT}/${rel_path}"
    if [[ "$DRY_RUN" == "yes" ]]; then
      info "  would restore: ${dest_path}"
      continue
    fi
    mkdir -p "$(dirname "$dest_path")"
    backup_existing "$dest_path"
    cp -r "$staged_path" "$dest_path"
    info "  restored: ${dest_path}"
  done < <(find "$stage_home" -not -type d -not -name "*.manifest.txt" -print0 2>/dev/null)

  success "Restore complete."
  info "1. Reload your shell:  source ~/.zshrc"
  info "2. Restart iTerm2 to pick up the restored dynamic profiles."
  info "3. On a new machine, run pimp-iterm-mac.sh first to ensure"
  info "   Oh My Zsh and plugins are installed before restoring."
}

main() { parse_args "$@"; run_restore; }
main "$@"
EOF
chmod +x restore-claude-terminal.sh
Restore from a specific backup with:
./restore-claude-terminal.sh ~/claude-backups/claude-terminal-backup-20260512120000.tar.gzBefore overwriting anything the restore script writes a .pre-restore.<timestamp> copy of each existing file. Use --list to inspect the archive contents without touching the filesystem. Use --dest ~/inspect to unpack into an alternate directory if you want to review the files before committing to a full restore.
7.3 When to run the backup
Run it after any of these events: a CLAUDE.md change that took meaningful time to write, a new iTerm2 profile you have tuned, a .claude/settings.json change in a key project, or before any macOS major version upgrade. The tarball is small enough that keeping thirty copies costs nothing. Losing a well-crafted global CLAUDE.md costs a session.
The two scripts sit alongside pimp-iterm-mac.sh in the same directory. On a new machine, run the installer first to get Oh My Zsh and the plugin stack in place, then run the restore script to bring your configuration back. The installer gives you the scaffolding. The restore script gives you your settings.
8. Session management for long Claude Code sessions
iTerm2 has native session management that most engineers ignore. For long Claude Code sessions, which can run for hours across multiple split panes, knowing how to save and restore your workspace is genuinely useful.
Split panes are the most underused iTerm2 feature for Claude Code work. The most effective layout is a main pane running Claude Code and a secondary pane for manual commands, log tailing, or test output. Split horizontally with Cmd+Shift+D (vertical split) or Cmd+D (horizontal split). Navigate between panes with Cmd+Option+Arrow.
Window arrangements let you save the current layout of windows, tabs, and panes and restore it later. Set up your preferred Claude Code workspace, then go to Window → Save Window Arrangement. Give it a name. Restore it with Window → Restore Window Arrangement. You can set a default arrangement to open automatically when iTerm2 launches.
Session restoration is under Settings → General → Startup. Set it to “Restore windows, tabs and panes from last session” and you return to exactly where you left off, including the working directory of each pane.
9. tmux versus iTerm2 native panes
iTerm2 native panes are sufficient for most local Claude Code sessions. They are visually integrated, support mouse interaction, and restore across restarts when you configure session restoration.
tmux is the better choice in two specific situations. First, when you are SSH’d into a remote machine running Claude Code and you need the session to persist across disconnects. iTerm2 panes die when the SSH connection drops. A tmux session on the remote server does not. Second, when you need to share a terminal session with another engineer for collaborative debugging, tmux’s session sharing is cleaner than screen sharing.
For local work, use iTerm2 panes. For remote work, use tmux. The answer is not either-or.
10. Diagnosing slow shell startup
Oh My Zsh with a plugin stack is not fast. Powerlevel10k’s instant prompt feature makes the prompt appear immediately while the rest of the shell initialises in the background, which eliminates most of the perceived lag. But actual startup time matters for scripts, CI pipelines that source your shell, and anything that spawns subshells.
Measure it:
time zsh -i -c exitAnything under 300ms is fine. 300ms to 700ms is tolerable but worth investigating. Above 700ms means something in your plugin stack or shell config is doing expensive work on every shell open.
To find the culprit, add zmodload zsh/zprof at the very top of your ~/.zshrc and zprof at the very bottom, open a new shell, and read the profiling output. The top entries by cumulative time are your targets.
The usual suspects are nvm (which does filesystem scanning on every shell open), rbenv and pyenv (same problem), kubectl completion loading synchronously, and any eval call that shells out to an external binary. The fix for most of these is lazy loading: only initialise the tool when you actually use it.
11. The terminal is part of the developer experience
A good terminal does not make you a better engineer by itself. But a bad terminal absolutely makes you slower. It hides context. It makes errors harder to read. It makes Git state invisible. It turns long running AI coding sessions into a wall of undifferentiated text.
The real point of this setup is not aesthetics. It is operating leverage. A terminal configured to show you what you need, without noise, with a Claude Code workspace that has actual project context through CLAUDE.md, with a permission model you understand and have thought about, is a meaningfully better working environment than the default.
The console is where intent becomes execution. Configure it like a tool you take seriously.