How to Set Up a Cloudflare Tunnel on a Raspberry Pi (From Zero to Live)

Cloudflare Tunnel lets you expose a Raspberry Pi service to the internet without port forwarding or a static IP. Install cloudflared on your Pi, authenticate it with your Cloudflare account, create a named tunnel, configure a public hostname pointing to your local service, then enable cloudflared as a systemd service so it starts automatically on reboot.
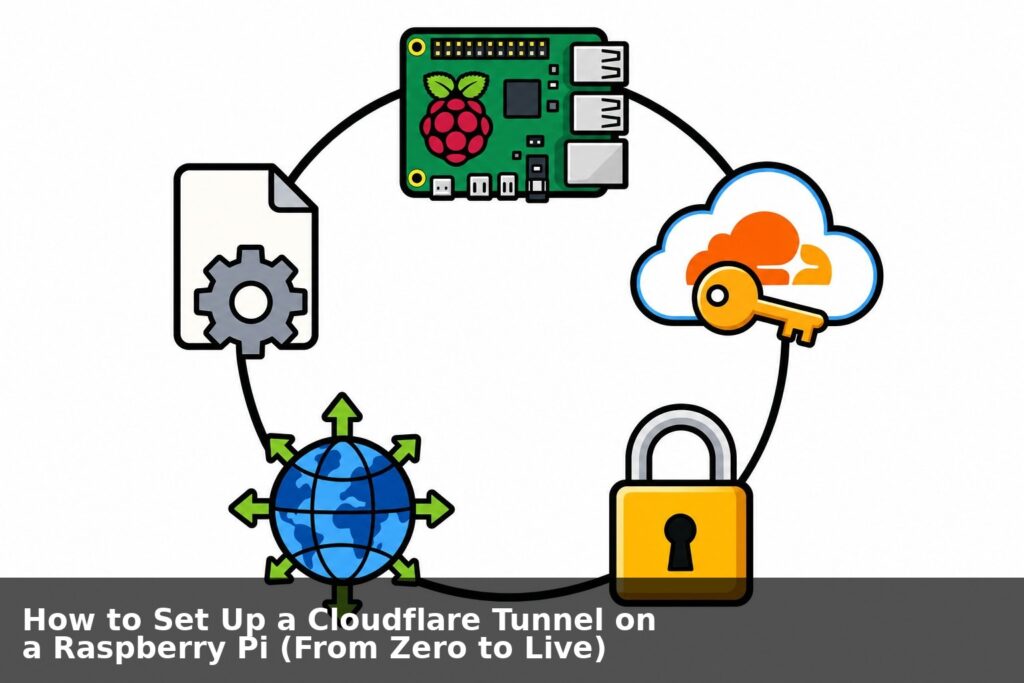
Goal: Expose a service running on your Raspberry Pi to the public internet, securely, without port-forwarding or a static IP, using Cloudflare Tunnel.
What You’ll End Up With
- A free Cloudflare account with your domain’s DNS managed by Cloudflare
- A Cloudflare Tunnel (
cloudflared) running as a systemd service on your Pi - A public HTTPS URL like
https://myapp.yourdomain.comthat proxies to any local service (e.g. WordPress on port 80, Home Assistant on port 8123) - A single script that handles the full setup and teardown
Prerequisites
| Requirement | Notes |
|---|---|
| Raspberry Pi (any model) | Running Raspberry Pi OS (64-bit recommended) |
| A domain name | e.g. yourdomain.com purchased anywhere (Namecheap, GoDaddy, etc.) |
| SSH access to the Pi | Or a keyboard and monitor attached |
| Internet connection | Pi must be online |
Part 1: Create a Cloudflare Account
1.1 Sign Up
- Go to https://dash.cloudflare.com/sign-up
- Enter your email and a strong password, then click Create Account
- Verify your email address
1.2 Add Your Domain to Cloudflare
- After logging in, click Add a site on the dashboard
- Enter your domain name (e.g.
yourdomain.com) and click Add site - Select the Free plan and click Continue
- Cloudflare will scan your existing DNS records; review them and click Continue
1.3 Update Your Nameservers
Cloudflare will give you two nameservers like:
aida.ns.cloudflare.com
brad.ns.cloudflare.com
Log in to wherever you purchased your domain and replace the existing nameservers with these two. The exact steps vary by registrar:
- Namecheap: Domain List > Manage > Nameservers > Custom DNS
- GoDaddy: My Domains > DNS > Nameservers > Change > Enter Custom
- Google Domains: DNS > Custom name servers
Nameserver propagation can take 5 minutes to 48 hours. Cloudflare will email you when it’s active. Your domain will show Active in the dashboard when ready.
Part 2: Get Your Cloudflare API Token
You need an API token so the setup script can create DNS records and configure the tunnel programmatically.
2.1 Create a Scoped API Token
- Go to https://dash.cloudflare.com/profile/api-tokens
- Click Create Token
- Click Use template next to Edit zone DNS
- Under Zone Resources, change the dropdown to Specific zone and select your domain
- Click Continue to summary, then Create Token
- Copy the token now – it is only shown once
The token will look like:
abc123XYZexampleTokenString_abcdefghijklmnopStore this token securely (e.g. in a password manager). Treat it like a password.
2.2 Find Your Zone ID and Account ID
Both are on your domain’s overview page in Cloudflare:
- Go to https://dash.cloudflare.com and click your domain
- On the right sidebar under API, copy:
- Zone ID (e.g.
abc123def456abc123def456abc12345) - Account ID (e.g.
xyz789xyz789xyz789xyz789xyz78901)
- Zone ID (e.g.
Part 3: How the Tunnel Works (Optional Reading)
Before running the automated script, here is what happens under the hood:
cloudflaredis installed on the Pi- A named tunnel is created via the Cloudflare API, generating a UUID and a credentials JSON file
- A DNS CNAME record is created:
myapp.yourdomain.compoints to<tunnel-uuid>.cfargotunnel.com - A
config.ymlis written that maps the hostname to your local service cloudflaredis installed as a systemd service so it starts on boot
The Pi never needs an open port or a static IP. Traffic flows: browser > Cloudflare edge > tunnel > Pi.
Part 4: The Setup Script
This single script handles everything: installing cloudflared, creating the tunnel via API, setting up DNS, writing the config, and installing the systemd service. It also has a teardown subcommand to remove everything cleanly.
4.1 Create the Script
Paste the entire block below into your Pi terminal. It writes the script to disk and makes it executable in one step:
cat > /usr/local/bin/cf-tunnel.sh << 'CFSCRIPT'
#!/usr/bin/env bash
# cf-tunnel.sh - Manage a Cloudflare Tunnel on a Raspberry Pi
# Usage: sudo cf-tunnel.sh setup
#        sudo cf-tunnel.sh teardown

set -euo pipefail

# ==============================================================================
# CONFIGURATION - fill these in before running
# ==============================================================================
CF_API_TOKEN=""       # API token from dash.cloudflare.com/profile/api-tokens
CF_ACCOUNT_ID=""      # Account ID from your domain's overview page
CF_ZONE_ID=""         # Zone ID from your domain's overview page
CF_DOMAIN=""          # Root domain, e.g. yourdomain.com
CF_SUBDOMAIN=""       # Subdomain to expose, e.g. myapp -> myapp.yourdomain.com
TUNNEL_NAME=""        # Name for this tunnel, e.g. pi-home
LOCAL_SERVICE=""      # Local service URL, e.g. http://localhost:80
# ==============================================================================

CONFIG_DIR="/root/.cloudflared"
RED='\033[0;31m'; GREEN='\033[0;32m'; YELLOW='\033[1;33m'; CYAN='\033[0;36m'; NC='\033[0m'
log()  { echo -e "${GREEN}[ok]${NC} $*"; }
info() { echo -e "${CYAN}[..]${NC} $*"; }
warn() { echo -e "${YELLOW}[!!]${NC} $*"; }
die()  { echo -e "${RED}[xx]${NC} $*" >&2; exit 1; }

require_root() {
  [[ $EUID -eq 0 ]] || die "Run as root: sudo $0 $*"
}

check_config() {
  local missing=()
  [[ -z "$CF_API_TOKEN"  ]] && missing+=("CF_API_TOKEN")
  [[ -z "$CF_ACCOUNT_ID" ]] && missing+=("CF_ACCOUNT_ID")
  [[ -z "$CF_ZONE_ID"    ]] && missing+=("CF_ZONE_ID")
  [[ -z "$CF_DOMAIN"     ]] && missing+=("CF_DOMAIN")
  [[ -z "$CF_SUBDOMAIN"  ]] && missing+=("CF_SUBDOMAIN")
  [[ -z "$TUNNEL_NAME"   ]] && missing+=("TUNNEL_NAME")
  [[ -z "$LOCAL_SERVICE" ]] && missing+=("LOCAL_SERVICE")
  [[ ${#missing[@]} -gt 0 ]] && die "Missing config: ${missing[*]} -- edit the CONFIGURATION block at the top of this script."
}

cf_api() {
  local method="$1" path="$2" data="${3:-}"
  local args=(-s -X "$method"
    -H "Authorization: Bearer $CF_API_TOKEN"
    -H "Content-Type: application/json")
  [[ -n "$data" ]] && args+=(-d "$data")
  curl "${args[@]}" "https://api.cloudflare.com/client/v4${path}"
}

verify_token() {
  info "Verifying Cloudflare API token..."
  local status
  status=$(cf_api GET "/user/tokens/verify" | python3 -c \
    "import sys,json; print(json.load(sys.stdin).get('result',{}).get('status',''))" 2>/dev/null || echo "")
  [[ "$status" == "active" ]] || die "API token invalid or missing DNS edit permission."
  log "Token verified"
}

install_cloudflared() {
  if command -v cloudflared &>/dev/null; then
    warn "cloudflared already installed: $(cloudflared --version)"
    return
  fi
  local arch cf_arch
  arch=$(uname -m)
  case "$arch" in
    aarch64) cf_arch="arm64" ;;
    armv7l)  cf_arch="arm"   ;;
    x86_64)  cf_arch="amd64" ;;
    *)       die "Unsupported architecture: $arch" ;;
  esac
  info "Downloading cloudflared for $arch..."
  curl -fsSL \
    "https://github.com/cloudflare/cloudflared/releases/latest/download/cloudflared-linux-${cf_arch}.deb" \
    -o /tmp/cloudflared.deb
  dpkg -i /tmp/cloudflared.deb
  rm -f /tmp/cloudflared.deb
  log "cloudflared installed: $(cloudflared --version)"
}

create_tunnel() {
  mkdir -p "$CONFIG_DIR"
  info "Checking for existing tunnel '$TUNNEL_NAME'..."
  local existing count
  existing=$(cf_api GET "/accounts/${CF_ACCOUNT_ID}/cfd_tunnel?name=${TUNNEL_NAME}&is_deleted=false")
  count=$(echo "$existing" | python3 -c \
    "import sys,json; print(len(json.load(sys.stdin).get('result',[])))" 2>/dev/null || echo "0")

  if [[ "$count" -gt 0 ]]; then
    warn "Tunnel '$TUNNEL_NAME' already exists, reusing it"
    TUNNEL_ID=$(echo "$existing" | python3 -c \
      "import sys,json; print(json.load(sys.stdin)['result'][0]['id'])")
    log "Tunnel ID: $TUNNEL_ID"
    return
  fi

  info "Creating tunnel '$TUNNEL_NAME'..."
  local secret payload response
  secret=$(openssl rand -hex 32)
  payload=$(python3 -c "import json; print(json.dumps({'name':'${TUNNEL_NAME}','tunnel_secret':'${secret}'}))")
  response=$(cf_api POST "/accounts/${CF_ACCOUNT_ID}/cfd_tunnel" "$payload")
  TUNNEL_ID=$(echo "$response" | python3 -c \
    "import sys,json; print(json.load(sys.stdin)['result']['id'])" 2>/dev/null || echo "")
  [[ -n "$TUNNEL_ID" ]] || die "Failed to create tunnel. Response: $response"
  log "Tunnel created: $TUNNEL_ID"

  python3 -c "
import json
print(json.dumps({'AccountTag':'${CF_ACCOUNT_ID}','TunnelSecret':'${secret}','TunnelID':'${TUNNEL_ID}'},indent=2))
" > "${CONFIG_DIR}/${TUNNEL_ID}.json"
  chmod 600 "${CONFIG_DIR}/${TUNNEL_ID}.json"
  log "Credentials written to ${CONFIG_DIR}/${TUNNEL_ID}.json"
}

create_dns_record() {
  local hostname="${CF_SUBDOMAIN}.${CF_DOMAIN}"
  local target="${TUNNEL_ID}.cfargotunnel.com"
  local payload
  payload=$(python3 -c "import json; print(json.dumps({'type':'CNAME','name':'${hostname}','content':'${target}','proxied':True,'ttl':1}))")

  info "Checking DNS record for $hostname..."
  local existing count
  existing=$(cf_api GET "/zones/${CF_ZONE_ID}/dns_records?name=${hostname}&type=CNAME")
  count=$(echo "$existing" | python3 -c \
    "import sys,json; print(len(json.load(sys.stdin).get('result',[])))" 2>/dev/null || echo "0")

  if [[ "$count" -gt 0 ]]; then
    local record_id
    record_id=$(echo "$existing" | python3 -c \
      "import sys,json; print(json.load(sys.stdin)['result'][0]['id'])")
    warn "DNS record exists, updating it"
    cf_api PUT "/zones/${CF_ZONE_ID}/dns_records/${record_id}" "$payload" > /dev/null
  else
    info "Creating DNS CNAME: $hostname -> $target"
    local response success
    response=$(cf_api POST "/zones/${CF_ZONE_ID}/dns_records" "$payload")
    success=$(echo "$response" | python3 -c \
      "import sys,json; print(json.load(sys.stdin).get('success','false'))" 2>/dev/null || echo "false")
    [[ "$success" == "True" ]] || die "Failed to create DNS record. Response: $response"
  fi
  log "DNS: $hostname -> $target (proxied)"
}

write_config() {
  local config_file="${CONFIG_DIR}/config.yml"
  local creds_file="${CONFIG_DIR}/${TUNNEL_ID}.json"
  local hostname="${CF_SUBDOMAIN}.${CF_DOMAIN}"

  info "Writing ${config_file}..."
  cat > "$config_file" << EOF
tunnel: ${TUNNEL_ID}
credentials-file: ${creds_file}

ingress:
  - hostname: ${hostname}
    service: ${LOCAL_SERVICE}
  - service: http_status:404
EOF
  chmod 600 "$config_file"
  log "Config written"
}

install_service() {
  if systemctl is-active --quiet cloudflared 2>/dev/null; then
    warn "cloudflared already running, restarting..."
    systemctl restart cloudflared
    return
  fi
  info "Installing cloudflared systemd service..."
  cloudflared --config "${CONFIG_DIR}/config.yml" service install
  systemctl enable cloudflared
  systemctl start cloudflared
  sleep 2
  systemctl is-active --quiet cloudflared \
    || die "Service failed to start. Check: journalctl -u cloudflared -n 50"
  log "cloudflared service is running"
}

cmd_setup() {
  require_root
  check_config
  verify_token
  install_cloudflared
  create_tunnel
  create_dns_record
  write_config
  install_service

  local hostname="${CF_SUBDOMAIN}.${CF_DOMAIN}"
  echo ""
  echo -e "${GREEN}============================================================${NC}"
  echo -e "${GREEN}  Cloudflare Tunnel Setup Complete${NC}"
  echo -e "${GREEN}============================================================${NC}"
  echo ""
  echo -e "  ${CYAN}Public URL:${NC}     https://${hostname}"
  echo -e "  ${CYAN}Tunnel Name:${NC}    ${TUNNEL_NAME}"
  echo -e "  ${CYAN}Tunnel ID:${NC}      ${TUNNEL_ID}"
  echo -e "  ${CYAN}Local Service:${NC}  ${LOCAL_SERVICE}"
  echo ""
  echo -e "  ${CYAN}Useful commands:${NC}"
  echo -e "    sudo systemctl status cloudflared"
  echo -e "    sudo journalctl -u cloudflared -f"
  echo -e "    sudo systemctl restart cloudflared"
  echo ""
  echo -e "${GREEN}============================================================${NC}"
}

cmd_teardown() {
  require_root
  check_config

  info "Stopping and removing cloudflared service..."
  systemctl stop cloudflared 2>/dev/null || true
  systemctl disable cloudflared 2>/dev/null || true
  cloudflared service uninstall 2>/dev/null || true
  log "Service removed"

  info "Looking up tunnel '$TUNNEL_NAME'..."
  local tunnel_list tunnel_id
  tunnel_list=$(cf_api GET "/accounts/${CF_ACCOUNT_ID}/cfd_tunnel?name=${TUNNEL_NAME}&is_deleted=false")
  tunnel_id=$(echo "$tunnel_list" | python3 -c \
    "import sys,json; r=json.load(sys.stdin)['result']; print(r[0]['id'] if r else '')" 2>/dev/null || echo "")

  if [[ -n "$tunnel_id" ]]; then
    info "Cleaning up tunnel connections..."
    cf_api DELETE "/accounts/${CF_ACCOUNT_ID}/cfd_tunnel/${tunnel_id}/connections" > /dev/null
    info "Deleting tunnel $tunnel_id..."
    cf_api DELETE "/accounts/${CF_ACCOUNT_ID}/cfd_tunnel/${tunnel_id}" > /dev/null
    log "Tunnel deleted"
  else
    warn "Tunnel '$TUNNEL_NAME' not found in Cloudflare, skipping"
  fi

  local hostname="${CF_SUBDOMAIN}.${CF_DOMAIN}"
  info "Looking up DNS record for $hostname..."
  local dns_record record_id
  dns_record=$(cf_api GET "/zones/${CF_ZONE_ID}/dns_records?name=${hostname}&type=CNAME")
  record_id=$(echo "$dns_record" | python3 -c \
    "import sys,json; r=json.load(sys.stdin)['result']; print(r[0]['id'] if r else '')" 2>/dev/null || echo "")

  if [[ -n "$record_id" ]]; then
    cf_api DELETE "/zones/${CF_ZONE_ID}/dns_records/${record_id}" > /dev/null
    log "DNS record for $hostname deleted"
  else
    warn "DNS record for $hostname not found, skipping"
  fi

  info "Removing local config..."
  rm -rf "$CONFIG_DIR"
  log "Local config removed"

  echo ""
  log "Teardown complete. The tunnel and DNS record have been removed from Cloudflare."
}

case "${1:-}" in
  setup)    cmd_setup ;;
  teardown) cmd_teardown ;;
  *)
    echo "Usage: sudo $0 <setup|teardown>"
    echo ""
    echo "  setup     Install cloudflared, create tunnel, set DNS, start service"
    echo "  teardown  Stop service, delete tunnel and DNS record from Cloudflare"
    exit 1
    ;;
esac
CFSCRIPT

chmod +x /usr/local/bin/cf-tunnel.sh
echo "Script written to /usr/local/bin/cf-tunnel.sh"
4.2 Fill In Your Values
Open the script and edit the CONFIGURATION block at the top:
nano /usr/local/bin/cf-tunnel.shUpdate these lines:
CF_API_TOKEN="abc123XYZexampleTokenString_abcdefghijklmnop"  # from Part 2.1
CF_ACCOUNT_ID="xyz789xyz789xyz789xyz789xyz78901"              # from Part 2.2
CF_ZONE_ID="abc123def456abc123def456abc12345"                 # from Part 2.2
CF_DOMAIN="yourdomain.com"
CF_SUBDOMAIN="myapp"              # creates myapp.yourdomain.com
TUNNEL_NAME="pi-home"
LOCAL_SERVICE="http://localhost:80"
4.3 Run Setup
sudo cf-tunnel.sh setupExample output:
[..] Verifying Cloudflare API token...
[ok] Token verified
[..] Downloading cloudflared for aarch64...
[ok] cloudflared installed: cloudflared version 2024.12.2
[..] Checking for existing tunnel 'pi-home'...
[ok] Tunnel created: a1b2c3d4-e5f6-7890-abcd-ef1234567890
[ok] Credentials written to /root/.cloudflared/a1b2c3d4-....json
[..] Creating DNS CNAME: myapp.yourdomain.com -> a1b2c3d4-....cfargotunnel.com
[ok] DNS: myapp.yourdomain.com -> a1b2c3d4-....cfargotunnel.com (proxied)
[ok] Config written
[ok] cloudflared service is running

============================================================
  Cloudflare Tunnel Setup Complete
============================================================

  Public URL:     https://myapp.yourdomain.com
  Tunnel Name:    pi-home
  Tunnel ID:      a1b2c3d4-e5f6-7890-abcd-ef1234567890
  Local Service:  http://localhost:80
4.4 Teardown (when you need it)
To completely remove the tunnel, DNS record, and service:
sudo cf-tunnel.sh teardownPart 5: Multiple Services on One Tunnel
You don’t need a separate tunnel per service. Edit /root/.cloudflared/config.yml directly to add more ingress rules:
tunnel: a1b2c3d4-e5f6-7890-abcd-ef1234567890
credentials-file: /root/.cloudflared/a1b2c3d4-e5f6-7890-abcd-ef1234567890.json

ingress:
  - hostname: wordpress.yourdomain.com
    service: http://localhost:80

  - hostname: homeassistant.yourdomain.com
    service: http://localhost:8123

  - hostname: grafana.yourdomain.com
    service: http://localhost:3000

  # required catch-all
  - service: http_status:404
For each new hostname, add a DNS record (substitute your own values):
curl -s -X POST "https://api.cloudflare.com/client/v4/zones/$CF_ZONE_ID/dns_records" \
  -H "Authorization: Bearer $CF_API_TOKEN" \
  -H "Content-Type: application/json" \
  -d "{\"type\":\"CNAME\",\"name\":\"grafana.yourdomain.com\",\"content\":\"$TUNNEL_ID.cfargotunnel.com\",\"proxied\":true,\"ttl\":1}"
Then reload:
sudo systemctl restart cloudflaredPart 6: Verify and Debug
Check service status:
sudo systemctl status cloudflaredTail live logs:
sudo journalctl -u cloudflared -fTest DNS propagation:
dig myapp.yourdomain.com CNAME +short
# Expected: a1b2c3d4-....cfargotunnel.com
Test the endpoint:
curl -I https://myapp.yourdomain.com
# Expected: HTTP/2 200
Common Issues
| Symptom | Likely Cause | Fix |
|---|---|---|
502 Bad Gateway | Local service is not running | Start the service on the Pi |
1033 error | Tunnel is not running | sudo systemctl start cloudflared |
526 Invalid SSL | Local service using self-signed cert | Use http:// not https:// for local service URL |
| DNS does not resolve | Nameservers not propagated | Wait up to 48 hours; check with dig NS yourdomain.com |
Invalid token | Token wrong or expired | Regenerate at dash.cloudflare.com/profile/api-tokens |
Summary
| Step | What Happened |
|---|---|
| Part 1 | Created a free Cloudflare account and moved your domain DNS to Cloudflare |
| Part 2 | Generated a scoped API token and collected Account ID + Zone ID |
| Part 3 | Understood how the tunnel works |
| Part 4 | Ran one script to install, configure, and start the tunnel |
| Part 5 | Added multiple services to a single tunnel |
| Part 6 | Verified the setup and resolved common issues |
Your Pi is now accessible from anywhere at https://myapp.yourdomain.com with:
- No open ports on your router
- No static IP required
- Free HTTPS via Cloudflare’s edge
- DDoS protection at the network layer
- Automatic restart via systemd on reboot
Last updated: April 2026 | Tested on Raspberry Pi 4 (aarch64) running Raspberry Pi OS Bookworm 64-bit