EC2 to Raspberry Pi WordPress Migration: Full Guide
Migrating WordPress from EC2 to a Raspberry Pi involves exporting your database and files, configuring a LAMP or LEMP stack on the Pi, importing your data, updating wp-config.php with new database credentials, pointing your DNS to your home IP, and setting up a reverse proxy with SSL through Cloudflare Tunnel to avoid exposing your router directly.
How I moved andrewbaker.ninja off AWS, saved hundreds of dollars a year, and ended up with better security in the process.
Running a personal site on AWS is completely reasonable when you are starting out. The tooling is mature, the reliability is excellent, and you can spin up a new instance in seconds. But somewhere around the point where you are paying R2,500 a month for a t4g.small in Cape Town to serve a blog that gets a few hundred visitors a day, it starts to feel like you are renting a forklift to carry groceries. The machine sits mostly idle, the AWS console emails you about cost anomalies, and the actual work the server does between midnight and 6am is precisely nothing.
I had been running andrewbaker.ninja on a t4g.small in af-south-1 for a couple of years. It worked fine. It cost roughly R1,800 per month and with bursts sometimes up to R2,500. When I bought a Raspberry Pi 5 for a monitoring project, I realised I already had everything I needed to host the site at home, expose it safely to the internet without opening a single firewall port, and keep full backups in S3 just like before. The monthly running cost dropped to a few rand of electricity and the annual hardware outlay pays for itself in months. I will share what my new AWS costs look like once I do a cleanup in a few weeks; I still use it for S3.
This guide covers everything: which hardware to buy, why SD card speed class matters more than most people think, how NVMe storage changes the equation, the exact Docker Compose stack I run, the scripts that do the migration in a single command, a real cost comparison against EC2, what Cloudflare’s free tier gives you on a self-hosted setup, and critically, what you lose when you leave AWS and how to replace it.
1. Why Leave EC2?
The case for EC2 is real. AWS gives you AMI snapshots, auto-healing, CloudWatch, a global CDN via CloudFront, and the ability to resize your instance in minutes. For a production SaaS product or a high-traffic site, the managed infrastructure is worth every cent.
For a personal site or small business blog with predictable, modest traffic, you are mostly paying for capability you never use. The af-south-1 region is also one of AWS’s more expensive regions. A t4g.small there costs around $0.024 per hour, which is roughly R550 per month before you add EBS storage, data transfer, and a static Elastic IP. Stick with a t4g.micro to save money and you are constrained to 1 GiB of RAM, which makes running a WordPress stack with a real PHP-FPM process pool noticeably painful.
The Raspberry Pi 5 with 8 GB of RAM runs the full WordPress stack with MariaDB, PHP-FPM, Nginx, Redis object cache, and a Cloudflare tunnel daemon, and still has headroom to spare. It boots in seconds, recovers from power interruptions reliably when paired with NVMe storage, and draws less than 7 watts at peak load. The comparison stops being abstract very quickly once you run the numbers.
2. Hardware: Choosing Your Raspberry Pi
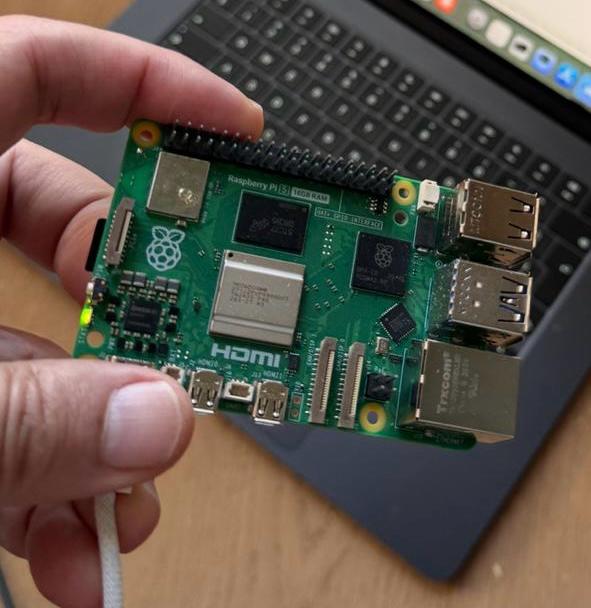
2.1 The Raspberry Pi 5
The Pi 5, released in late 2023, is meaningfully different from every Pi that came before it. The Broadcom BCM2712 quad-core Arm Cortex-A76 processor running at 2.4 GHz delivers roughly two to three times the single-core performance of the Cortex-A72 in the Pi 4B. That matters for WordPress because PHP execution is largely single-threaded, and database query parsing is similarly bound to per-core speed.
The Pi 5 also introduces a PCIe 2.0 lane via the new FFC connector on the board, which is the foundation for NVMe storage. This is the biggest practical improvement over the Pi 4 for server workloads. The Pi 4 could only boot from USB or SD card, meaning database I/O was always constrained by the relatively slow random access characteristics of those storage types. The Pi 5 can attach an NVMe SSD directly, and the difference in database performance is substantial.
Raspberry Pi 5 (Current Generation)
| Model | Current Price (USD) |
|---|---|
| 1 GB | $45 |
| 2 GB | $65 |
| 3 GB (new model) | $80 |
| 4 GB | $100 |
| 8 GB | $145 |
| 16 GB | $219 |
Raspberry Pi 4 Model B (Previous Generation)
| Model | Current Price (USD) |
|---|---|
| 1 GB | $35 |
| 2 GB | $45 |
| 3 GB (new model) | $83.75 |
| 4 GB | $85 |
| 8 GB | $135 |
For a WordPress stack that includes MariaDB, PHP-FPM worker processes, and a Redis cache, the 8 GB model is the right choice. With 4 GB you will be monitoring memory usage closely and tuning aggressively. With 8 GB the stack runs comfortably and you have room for a few concurrent admin sessions without hitting swap.
Power consumption is one of the Pi 5’s genuine virtues. At idle it draws around 2.7 watts. Under a sustained PHP workload it reaches roughly 6.8 watts. For a site that serves a few hundred visitors a day the average draw over a 24-hour period sits somewhere around 3 to 4 watts, which amounts to less than 35 kWh per year.
2.2 Raspberry Pi 4 Model B as an Alternative
If you already own a Pi 4B or want to save money, the Pi 4B will run the stack described in this guide. The 4 GB and 8 GB variants have enough memory, and the ARM Cortex-A72 is perfectly adequate for low-to-moderate traffic. The key limitation is storage: the Pi 4B has no PCIe lane and no native NVMe support. You can attach an NVMe drive via a USB 3.0 adapter and it will be substantially faster than an SD card, but it is not the same as a direct PCIe connection. If you are starting fresh, the Pi 5 is worth the premium.
3. Storage: SD Cards, NVMe, and Why It Matters
3.1 Understanding SD Card Speed Classes
Most people buying a Raspberry Pi pick up whatever microSD card is available at their nearest electronics retailer without giving it much thought. For a media player or a desktop replacement this is fine. For a WordPress server it is the most important hardware decision you make after choosing the Pi model itself.
The relevant standard here is the SD Association’s Application Performance Class, which defines the minimum random I/O operations per second a card must sustain. There are two tiers.
A1 (Application Performance Class 1): 1,500 random read IOPS and 500 random write IOPS, with a 10 MB/s sustained sequential write speed.
A2 (Application Performance Class 2): 4,000 random read IOPS and 2,000 random write IOPS, with the same 10 MB/s sequential write floor.
WordPress with MariaDB generates a constant stream of small, scattered reads and writes. Every page load triggers multiple database queries, each of which translates into random 4 KB block reads against the InnoDB storage files. A card that can sustain 4,000 random read IOPS handles this traffic pattern very differently from one that can only sustain a few hundred. The difference between a cheap A1 card and a good A2 card is often the difference between a 200ms page generation time and an 800ms one.
Beyond IOPS, endurance matters. Consumer SD cards are not designed for the write amplification that comes from a constantly active database. A card rated for photography or video recording is engineered for sequential writes, not the random small writes that MariaDB generates. Cards sold explicitly for IoT and dashcam use, like the Samsung Pro Endurance and the SanDisk High Endurance, use more durable NAND and more conservative wear-levelling algorithms. They cost a few dollars more and last far longer in this workload.
Recommended cards for SD-only setups: the Samsung Pro Endurance 64 GB or 128 GB (A1, rated up to 43,800 hours endurance) and the SanDisk MAX Endurance 128 GB or 256 GB (A1, purpose-built for continuous write workloads).
Even with a good A2 card, the SD card remains the bottleneck in your stack. If you are running the Pi 5, move to NVMe.
3.2 NVMe Storage via the M.2 HAT+
The official Raspberry Pi M.2 HAT+ is a $12 board that mounts to the Pi 5’s 40-pin GPIO header and exposes the PCIe FFC connector as a standard M.2 key M slot. It supports 2230 and 2242 form-factor drives and delivers up to 500 MB/s throughput via PCIe 2.0. There is also a compact variant that supports only 2230 drives but fits inside the official Pi 5 case.
A compact 256 GB NVMe SSD (a WD SN520, Kioxia BG5, or Samsung PM991A 2230 drive) costs around $25 to $35 and transforms the storage profile of the system. Sequential reads jump from the 20 to 30 MB/s range of a good SD card to 400 to 500 MB/s. More importantly for WordPress, random 4K read IOPS go from the hundreds into the tens of thousands. The database stops being a bottleneck almost entirely.
The Pi 5 can also be configured to boot from the NVMe drive directly. Once you have done this, the SD card becomes optional. I keep a small SD card in the slot for recovery purposes but the entire operating system and Docker data directory live on the NVMe.
Third-party options worth considering include the Pimoroni NVMe Base, which provides the same M.2 interface in a different form factor, and the Geekworm X1004, which adds heatsink integration. All of them expose the same PCIe 2.0 lane, so the performance ceiling is identical.
| SD Card | Pi 5 NVMe (PCIe 2.0) | AWS EBS gp3 | AWS EBS io2 | |
|---|---|---|---|---|
| Sequential read | 20-30 MB/s | 400-500 MB/s | 250-1,000 MB/s | Up to 4,000 MB/s |
| Sequential write | 10-20 MB/s | 350-450 MB/s | 250-1,000 MB/s | Up to 4,000 MB/s |
| Random 4K read IOPS | ~200-500 | 40,000-60,000 | 3,000 baseline / up to 16,000 | Up to 64,000 |
| Random 4K write IOPS | ~200-400 | 30,000-50,000 | 3,000 baseline / up to 16,000 | Up to 64,000 |
| Latency | 5-20 ms | less than 0.1 ms | 1-2 ms | less than 1 ms |
| Capacity (this config) | 32-64 GB | 256 GB | 8 GB-16 TB | 4 GB-16 TB |
| Cost per GB | ~$0.0003-0.0006/month | ~$0.002-0.003/month | $0.08/GB/month | $0.125/GB/month |
| Monthly cost | ~$0 | ~$0 | ~$2-8/month (8-32 GB) | ~$13-52/month (8-32 GB) |
gp3 baseline is 3,000 IOPS regardless of volume size; provisioning higher IOPS costs $0.005 per IOPS/month above 3,000. io2 is priced at $0.065 per GB/month plus $0.065 per provisioned IOPS/month up to 32,000, and $0.046/IOPS above that.
The practical recommendation: buy the Pi 5 8 GB, the official M.2 HAT+, and a 2230 NVMe SSD. Use the SD card only as a boot recovery device. This setup costs roughly $180 to $190 in hardware and delivers database performance that a t4g.small on EBS gp3 storage cannot match for random read workloads, and does so at zero ongoing storage cost.
4. The Software Stack
The stack running andrewbaker.ninja on the Pi is entirely containerised using Docker Compose. Running everything in containers on the Pi might seem like adding unnecessary complexity for a single-purpose device, but the benefits are real. The containers are identical to what you could run on any other ARM64 machine, which means the entire stack can be reproduced on a replacement Pi in under ten minutes by running two commands. Upgrades are a one-line image tag change followed by a docker compose pull && docker compose up -d. There is no system Python to break, no conflicting PHP versions, and no apt history to reconstruct.
The five services are:
MariaDB 11 running the official ARM64 multi-architecture image, tuned with a custom my.cnf that reduces the InnoDB buffer pool to match the available memory and enables the performance schema. The database data lives in a named Docker volume, which in practice maps to the NVMe drive.
WordPress 6.7 on PHP 8.3-FPM Alpine, built from the official WordPress image with WP-CLI and a handful of must-use plugins baked in at build time. PHP-FPM is configured with a static pool of 50 pre-forked workers.
Nginx 1.27 Alpine as the reverse proxy and static file server. It handles FastCGI caching so that anonymous page views are served entirely from cache without touching PHP or the database. This is the most important single performance optimisation in the stack.
Redis 7 Alpine as the WordPress object cache backend. The Redis Object Cache plugin connects WordPress to this container and caches the result of every database query. Combined with Nginx FastCGI caching, a cached page on the Pi serves from memory in under 5ms.
cloudflared runs as a systemd service directly on the Pi operating system rather than as a Docker container. Traffic arrives at Cloudflare’s edge, travels through the encrypted tunnel to the Pi, hits Nginx, and returns the same way. Nothing in the house is exposed to the internet.
Here is the complete docker-compose.yml:
services:

  mariadb:
    image: mariadb:11
    container_name: pi_mariadb
    restart: unless-stopped
    environment:
      MYSQL_ROOT_PASSWORD: ${MYSQL_ROOT_PASSWORD}
      MYSQL_DATABASE:      ${MYSQL_DATABASE}
      MYSQL_USER:          ${MYSQL_USER}
      MYSQL_PASSWORD:      ${MYSQL_PASSWORD}
    volumes:
      - db_data:/var/lib/mysql
      - ./mariadb/my.cnf:/etc/mysql/conf.d/pi-tuning.cnf:ro
    networks:
      - backend
    deploy:
      resources:
        limits:
          memory: 2G
        reservations:
          memory: 512M
    healthcheck:
      test: ["CMD", "healthcheck.sh", "--connect", "--innodb_initialized"]
      interval: 10s
      timeout: 5s
      retries: 5
      start_period: 30s

  redis:
    image: redis:7-alpine
    container_name: pi_redis
    restart: unless-stopped
    command: >
      redis-server
        --requirepass ${REDIS_PASSWORD}
        --maxmemory 512mb
        --maxmemory-policy allkeys-lru
        --save ""
        --appendonly no
    networks:
      - backend
    deploy:
      resources:
        limits:
          memory: 640M
        reservations:
          memory: 128M
    healthcheck:
      test: ["CMD", "redis-cli", "-a", "${REDIS_PASSWORD}", "ping"]
      interval: 10s
      timeout: 3s
      retries: 5

  wordpress:
    build:
      context: ./wordpress
      dockerfile: Dockerfile
    image: pi_wordpress_custom
    container_name: pi_wordpress
    restart: unless-stopped
    depends_on:
      mariadb:
        condition: service_healthy
      redis:
        condition: service_healthy
    environment:
      WORDPRESS_DB_HOST:      ${WORDPRESS_DB_HOST}
      WORDPRESS_DB_NAME:      ${WORDPRESS_DB_NAME}
      WORDPRESS_DB_USER:      ${WORDPRESS_DB_USER}
      WORDPRESS_DB_PASSWORD:  ${WORDPRESS_DB_PASSWORD}
      WORDPRESS_TABLE_PREFIX: ${WORDPRESS_TABLE_PREFIX}
      WORDPRESS_AUTH_KEY:         ${WORDPRESS_AUTH_KEY}
      WORDPRESS_SECURE_AUTH_KEY:  ${WORDPRESS_SECURE_AUTH_KEY}
      WORDPRESS_LOGGED_IN_KEY:    ${WORDPRESS_LOGGED_IN_KEY}
      WORDPRESS_NONCE_KEY:        ${WORDPRESS_NONCE_KEY}
      WORDPRESS_AUTH_SALT:        ${WORDPRESS_AUTH_SALT}
      WORDPRESS_SECURE_AUTH_SALT: ${WORDPRESS_SECURE_AUTH_SALT}
      WORDPRESS_LOGGED_IN_SALT:   ${WORDPRESS_LOGGED_IN_SALT}
      WORDPRESS_NONCE_SALT:       ${WORDPRESS_NONCE_SALT}
      WORDPRESS_CONFIG_EXTRA: |
        define('WP_REDIS_HOST', 'redis');
        define('WP_REDIS_PASSWORD', '${REDIS_PASSWORD}');
        define('WP_REDIS_PORT', 6379);
        define('WP_REDIS_DATABASE', 0);
        define('WP_REDIS_TIMEOUT', 1);
        define('WP_REDIS_READ_TIMEOUT', 1);
        define('WP_REDIS_PREFIX', 'ab_');
        define('WP_POST_REVISIONS', 3);
        define('AUTOSAVE_INTERVAL', 120);
        define('EMPTY_TRASH_DAYS', 7);
        define('WP_MEMORY_LIMIT', '256M');
        define('WP_MAX_MEMORY_LIMIT', '512M');
        if (isset($_SERVER['HTTP_X_FORWARDED_PROTO']) && $_SERVER['HTTP_X_FORWARDED_PROTO'] === 'https') {
            $_SERVER['HTTPS'] = 'on';
        }
        define('FORCE_SSL_ADMIN', true);
        define('WP_HOME',    '${WORDPRESS_HOME_URL}');
        define('WP_SITEURL', '${WORDPRESS_SITE_URL}');
    volumes:
      - wp_data:/var/www/html
      - ./php/php.ini:/usr/local/etc/php/conf.d/99-custom.ini:ro
      - ./php/www.conf:/usr/local/etc/php-fpm.d/www.conf:ro
      - ./wordpress/mu-plugins:/var/www/html/wp-content/mu-plugins:ro
    networks:
      - backend
    deploy:
      resources:
        limits:
          memory: 3G
        reservations:
          memory: 256M

  nginx:
    image: nginx:1.27-alpine
    container_name: pi_nginx
    restart: unless-stopped
    depends_on:
      - wordpress
    ports:
      - "8082:80"
    volumes:
      - wp_data:/var/www/html:ro
      - ./nginx/nginx.conf:/etc/nginx/nginx.conf:ro
      - ./nginx/wordpress.conf:/etc/nginx/conf.d/default.conf:ro
      - nginx_cache:/var/cache/nginx/fastcgi
    networks:
      - backend
    deploy:
      resources:
        limits:
          memory: 256M
        reservations:
          memory: 64M
    healthcheck:
      test: ["CMD", "wget", "-qO-", "http://127.0.0.1/nginx-health"]
      interval: 15s
      timeout: 5s
      retries: 3

networks:
  backend:
    driver: bridge
    ipam:
      config:
        - subnet: 172.20.0.0/24

volumes:
  db_data:
    driver: local
  wp_data:
    driver: local
  nginx_cache:
    driver: local
The Nginx server block (nginx/wordpress.conf):
map $http_cookie $skip_cache {
    default 0;
    "~wordpress_logged_in" 1;
    "~comment_author"      1;
    "~woocommerce_cart"    1;
}

map $request_method $skip_cache_method {
    default 0;
    POST    1;
}

server {
    listen 80;
    server_name _;
    root  /var/www/html;
    index index.php;

    location = /nginx-health {
        access_log off;
        return 200 "ok\n";
        add_header Content-Type text/plain;
    }

    location ~* \.(css|js|woff2?|ttf|otf|eot|svg|ico|webp|png|jpg|jpeg|gif|mp4|webm)$ {
        expires     1y;
        add_header  Cache-Control "public, immutable";
        log_not_found off;
        access_log  off;
        try_files   $uri =404;
    }

    location ^~ /wp-content/uploads/ {
        expires     30d;
        add_header  Cache-Control "public";
        try_files   $uri =404;
    }

    location = /xmlrpc.php { deny all; access_log off; log_not_found off; }
    location ~ /\.          { deny all; access_log off; log_not_found off; }
    location / { try_files $uri $uri/ /index.php?$args; }

    location ~ \.php$ {
        if ($uri ~* "^/wp-content/uploads/") { return 403; }
        try_files $uri =404;
        fastcgi_split_path_info ^(.+\.php)(/.+)$;
        fastcgi_pass   wordpress:9000;
        fastcgi_index  index.php;
        include        fastcgi_params;
        fastcgi_param  SCRIPT_FILENAME  $document_root$fastcgi_script_name;
        fastcgi_param  PATH_INFO        $fastcgi_path_info;
        fastcgi_param  HTTPS            on;
        fastcgi_connect_timeout 10s;
        fastcgi_send_timeout    60s;
        fastcgi_read_timeout    60s;
        fastcgi_buffer_size          16k;
        fastcgi_buffers              4 32k;
        fastcgi_busy_buffers_size    64k;
        fastcgi_cache         WP_CACHE;
        fastcgi_cache_valid   200 301 302  1h;
        fastcgi_cache_valid   404          1m;
        fastcgi_cache_use_stale error timeout updating invalid_header http_500;
        fastcgi_cache_lock    on;
        fastcgi_cache_bypass  $skip_cache $skip_cache_method;
        fastcgi_no_cache      $skip_cache $skip_cache_method;
        add_header  X-Cache-Status $upstream_cache_status always;
        add_header  Cache-Control "no-store, private" always;
    }

    location ~* /wp-admin/ {
        try_files $uri $uri/ /index.php?$args;
        location ~ \.php$ {
            try_files $uri =404;
            fastcgi_split_path_info ^(.+\.php)(/.+)$;
            fastcgi_pass  wordpress:9000;
            fastcgi_index index.php;
            include       fastcgi_params;
            fastcgi_param SCRIPT_FILENAME $document_root$fastcgi_script_name;
            fastcgi_param HTTPS on;
            fastcgi_cache off;
        }
    }
}
The MariaDB tuning file (mariadb/my.cnf):
[mysqld]
character-set-server  = utf8mb4
collation-server      = utf8mb4_unicode_ci
innodb_buffer_pool_size         = 1G
innodb_log_file_size            = 128M
innodb_log_buffer_size          = 32M
innodb_flush_log_at_trx_commit  = 2
innodb_read_io_threads          = 4
innodb_write_io_threads         = 4
innodb_io_capacity              = 2000
innodb_io_capacity_max          = 4000
max_connections         = 100
max_connect_errors      = 1000
wait_timeout            = 180
interactive_timeout     = 180
thread_stack            = 256K
thread_cache_size       = 16
query_cache_type        = 0
query_cache_size        = 0
aria_pagecache_buffer_size = 256M
tmp_table_size          = 64M
max_heap_table_size     = 64M
slow_query_log          = 1
slow_query_log_file     = /var/lib/mysql/slow-queries.log
long_query_time         = 1
skip-log-bin
skip-name-resolve
open_files_limit        = 8192
table_open_cache        = 1000
table_definition_cache  = 1000

[client]
default-character-set = utf8mb4

[mysql]
default-character-set = utf8mb4
The PHP-FPM pool configuration (php/www.conf):[www]
user = www-data
group = www-data
listen = 0.0.0.0:9000
pm = static
pm.max_children = 50
pm.max_requests = 1000
request_terminate_timeout = 60s
access.log = /dev/null
php_flag[display_errors] = off
php_admin_value[error_log] = /dev/stderr
php_admin_flag[log_errors] = on
pm.status_path = /fpm-status
ping.path = /fpm-ping5. Prerequisites
Before running any of the scripts below, you need the following in place.
On the Pi you need Raspberry Pi OS Lite (64-bit) or Ubuntu Server 24.04 LTS for ARM64, Docker CE with the Compose plugin, Git, the AWS CLI, and Python 3.
On your Mac you need SSH access to the Pi (key at ~/.ssh/pi_key), rsync, and cloudflared installed via brew install cloudflared. The Pi should be reachable on your local network by hostname (your-pi.local) or static IP.
Create a .env file in your project directory on the Pi. This file is not committed to git and is the only thing you need to keep safe outside of S3:
MYSQL_ROOT_PASSWORD=changeme_root
MYSQL_DATABASE=wordpress
MYSQL_USER=wordpress
MYSQL_PASSWORD=changeme_wp
WORDPRESS_DB_HOST=mariadb:3306
WORDPRESS_DB_NAME=wordpress
WORDPRESS_DB_USER=wordpress
WORDPRESS_DB_PASSWORD=changeme_wp
WORDPRESS_TABLE_PREFIX=wp_

# Generate fresh values at: https://api.wordpress.org/secret-key/1.1/salt/
WORDPRESS_AUTH_KEY=put-a-random-string-here
WORDPRESS_SECURE_AUTH_KEY=put-a-random-string-here
WORDPRESS_LOGGED_IN_KEY=put-a-random-string-here
WORDPRESS_NONCE_KEY=put-a-random-string-here
WORDPRESS_AUTH_SALT=put-a-random-string-here
WORDPRESS_SECURE_AUTH_SALT=put-a-random-string-here
WORDPRESS_LOGGED_IN_SALT=put-a-random-string-here
WORDPRESS_NONCE_SALT=put-a-random-string-here

WORDPRESS_SITE_URL=https://your-domain.example.com
WORDPRESS_HOME_URL=https://your-domain.example.com

EC2_HOST=ec2-xx-xx-xx-xx.af-south-1.compute.amazonaws.com
EC2_USER=ec2-user
EC2_SSH_KEY=/path/to/your/key.pem
EC2_WP_ROOT=/var/www/html

CF_ZONE_ID=your-zone-id-here
REDIS_PASSWORD=changeme_redis
6. Getting the Pi Ready
Clone or copy your project files to the Pi and place the .env file in the project root. Create the scripts directory and paste each script below to create it, then bring up the stack:
mkdir -p scriptscat > scripts/deploy.sh </dev/null || { echo "ERROR: docker not found"; exit 1; }
docker compose version &>/dev/null || { echo "ERROR: docker compose plugin not found"; exit 1; }
[[ -f ".env" ]] || { echo "ERROR: .env not found. Copy .env.example and fill in your values."; exit 1; }
source .env
if [[ -z "${CLOUDFLARE_TUNNEL_TOKEN:-}" || "${CLOUDFLARE_TUNNEL_TOKEN}" == "your-tunnel-token-here" ]]; then
echo "ERROR: CLOUDFLARE_TUNNEL_TOKEN is not set -- run scripts/setup-cf-tunnel.sh first."
exit 1
fi
if [[ "${FRESH}" == "true" ]]; then
echo "WARNING: --fresh will destroy all volumes (database + WordPress files)."
read -r -p "Are you sure? [y/N] " confirm
[[ "${confirm,,}" == "y" ]] || { echo "Aborted."; exit 0; }
docker compose down -v --remove-orphans 2>/dev/null || true
fi
echo "=== Pulling latest images ==="
docker compose pull
mkdir -p /tmp/nginx-cache 2>/dev/null || true
echo "=== Starting stack ==="
docker compose up -d --remove-orphans
echo "=== Waiting for Nginx to be healthy ==="
MAX_WAIT=90; ELAPSED=0
until docker compose exec -T nginx wget -qO- http://localhost/nginx-health &>/dev/null; do
[[ ${ELAPSED} -ge ${MAX_WAIT} ]] && {
echo "ERROR: Nginx not healthy after ${MAX_WAIT}s"
docker compose logs nginx
exit 1
}
echo " Waiting... (${ELAPSED}s)"; sleep 5; ELAPSED=$((ELAPSED + 5))
done
echo "=== Installing WP-CLI ==="
docker compose exec -T -u root wordpress sh -c '
if ! command -v wp &>/dev/null; then
curl -sO https://raw.githubusercontent.com/wp-cli/builds/gh-pages/phar/wp-cli.phar &&
chmod +x wp-cli.phar && mv wp-cli.phar /usr/local/bin/wp && echo "WP-CLI installed."
else
echo "WP-CLI already present: $(wp --version --allow-root 2>/dev/null || true)"
fi
' 2>/dev/null || true
echo "=== Upgrading WordPress core ==="
docker compose exec -T -u root wordpress sh -c '
wp core update --allow-root 2>&1 | tail -3 || true
wp core update-db --allow-root 2>&1 | tail -2 || true
' 2>/dev/null || true
echo "Stack is UP."
docker compose ps
EOF
chmod +x scripts/deploy.shOnce the script is created, bring up the stack. Pass --fresh to wipe all volumes and start clean:
bash scripts/deploy.shTo push config file changes from your Mac to the Pi without restarting containers, create push-to-pi.sh on your Mac and run it from there:
cat > scripts/push-to-pi.sh << 'EOF'
#!/usr/bin/env bash
# push-to-pi.sh -- Sync project directory to the Pi from your Mac.
# Does NOT restart containers. SSH into the Pi and run deploy.sh after.
set -euo pipefail

SCRIPT_DIR="$(cd "$(dirname "${BASH_SOURCE[0]}")/.." && pwd)"
PI_HOST="ssh.your-domain.example.com"
PI_USER="pi"
PI_DIR="~/your-project-dir"
SSH_OPTS="-o ProxyCommand='cloudflared access ssh --hostname ${PI_HOST}' \
    -o StrictHostKeyChecking=no \
    -o ServerAliveInterval=15 \
    -o ServerAliveCountMax=10"

echo "Syncing to ${PI_USER}@${PI_HOST}:${PI_DIR}"
rsync -avz --progress \
    -e "ssh ${SSH_OPTS}" \
    --exclude='.git' \
    --exclude='.DS_Store' \
    --exclude='.env' \
    "${SCRIPT_DIR}/" \
    "${PI_USER}@${PI_HOST}:${PI_DIR}/"

ssh ${SSH_OPTS} "${PI_USER}@${PI_HOST}" "chmod +x ${PI_DIR}/scripts/*.sh"
echo "Done. SSH into the Pi and run: cd ${PI_DIR} && bash scripts/deploy.sh"
EOF
chmod +x scripts/push-to-pi.sh
7. Cloudflare Tunnel: Your Zero-Configuration HTTPS Gateway
The Cloudflare Tunnel approach deserves its own explanation because it is not obvious why it is better than the traditional alternatives.
The traditional way to self-host a public website is to either set up port forwarding on your router (opening port 80 and 443 to the world) or use a VPS as a reverse proxy. Port forwarding exposes your home IP address, requires a stable IP from your ISP, and opens your router to the internet. A VPS proxy solves the IP problem but adds cost and complexity.
Cloudflare Tunnel works the other way around. The cloudflared daemon on the Pi opens an outbound HTTPS connection to Cloudflare’s edge network and keeps it open. When a request arrives for your domain, Cloudflare sends it down that tunnel to the Pi. Your router never needs a port forwarding rule. Your home IP is never exposed. TLS is terminated at Cloudflare’s edge before the request even reaches your home network.
The free tier of Cloudflare includes tunnels with no traffic limits and no bandwidth charges. You can run as many sites as you like through a single tunnel daemon by adding ingress rules.
Create the tunnel setup script on your Mac and run it once to add your hostname, push the updated config to the Pi, and reload cloudflared:
cat > scripts/setup-cf-tunnel.sh </dev/null \
    || { echo "ERROR: Cannot reach Pi"; exit 1; }
echo "  Pi reachable."

echo "Step 2: Adding DNS CNAME for ${HOSTNAME}..."
ssh ${SSH_OPTS} ${PI_USER}@${PI_HOST} \
    "cloudflared tunnel route dns ${TUNNEL_NAME} ${HOSTNAME} 2>&1 || true"

echo "Step 3: Pushing updated config to Pi..."
scp ${SSH_OPTS} "${CF_CONFIG}" "${PI_USER}@${PI_HOST}:/home/${PI_USER}/.cloudflared/config.yml"

echo "Step 4: Validating config on Pi..."
ssh ${SSH_OPTS} ${PI_USER}@${PI_HOST} "cloudflared tunnel ingress validate 2>&1"

echo "Step 5: Reloading cloudflared..."
ssh ${SSH_OPTS} ${PI_USER}@${PI_HOST} \
    "sudo systemctl reload cloudflared 2>/dev/null || sudo systemctl restart cloudflared"
sleep 3
STATUS=$(ssh ${SSH_OPTS} ${PI_USER}@${PI_HOST} "systemctl is-active cloudflared")
echo "  cloudflared status: ${STATUS}"
echo "Done. DNS propagates in ~30 seconds. Site: https://${HOSTNAME}"
EOF
chmod +x scripts/setup-cf-tunnel.sh
Your cloudflare/config.yml routes each hostname to Nginx on port 8082:
tunnel: your-tunnel-uuid
credentials-file: /home/pi/.cloudflared/your-tunnel-uuid.json

ingress:
  - hostname: yoursite.example.com
    service: http://localhost:8082
  - service: http_status:404
8. Running the Migration
8.1 Initial Migration from EC2
Create the migration script on the Pi and run it. It connects to EC2 over SSH, exports a full database dump, downloads it, rsyncs wp-content/uploads into the running WordPress container, imports the database into MariaDB, runs wp search-replace to swap URLs (handling serialised PHP data correctly), installs and activates the Redis Object Cache plugin, syncs the active theme, and flushes all caches:
cat > scripts/sync-from-ec2.sh </dev/null || echo 'unknown'")
echo "  Old URL: ${OLD_URL}"
$SSH "cd ${EC2_WP_ROOT} && wp db export /tmp/${DUMP_FILE} --allow-root"

echo "Step 2: Downloading database dump..."
scp -i "${EC2_SSH_KEY}" -o StrictHostKeyChecking=no \
    "${EC2_USER}@${EC2_HOST}:/tmp/${DUMP_FILE}" "${LOCAL_DUMP}"

echo "Step 3: Syncing wp-content/uploads..."
docker compose exec -T wordpress mkdir -p /var/www/html/wp-content/uploads
rsync -avz --progress \
    -e "ssh -i ${EC2_SSH_KEY} -o StrictHostKeyChecking=no" \
    "${EC2_USER}@${EC2_HOST}:${EC2_WP_ROOT}/wp-content/uploads/" \
    /tmp/uploads-sync/
docker compose cp /tmp/uploads-sync/. wordpress:/var/www/html/wp-content/uploads/
docker compose exec -T wordpress chown -R www-data:www-data /var/www/html/wp-content/uploads
echo "  Uploads synced."

echo "Step 4: Importing database..."
docker compose cp "${LOCAL_DUMP}" mariadb:/tmp/import.sql
docker compose exec -T mariadb sh -c \
    "mariadb -u${MYSQL_USER} -p${MYSQL_PASSWORD} ${MYSQL_DATABASE} < /tmp/import.sql"
echo "  Database imported."

echo "Step 5: Replacing old URL with new URL..."
docker compose exec -T wordpress wp search-replace \
    "${OLD_URL}" "${NEW_URL}" --all-tables --allow-root --precise

echo "Step 6: Installing Redis Object Cache plugin..."
docker compose exec -T wordpress wp plugin install redis-cache --activate --allow-root || true
docker compose exec -T wordpress wp redis enable --allow-root || true

echo "Step 7: Syncing theme..."
THEME_DIR="$(dirname "${REPO_ROOT}")/your-theme-repo"
if [[ -d "${THEME_DIR}/your-theme" ]]; then
    docker compose cp "${THEME_DIR}/your-theme/." \
        wordpress:/var/www/html/wp-content/themes/your-theme/
    docker compose exec -T wordpress chown -R www-data:www-data \
        /var/www/html/wp-content/themes/your-theme
    docker compose exec -T wordpress wp theme activate your-theme --allow-root || true
    echo "  Theme synced and activated."
else
    echo "  WARN: Theme dir not found -- skipping."
fi

echo "Step 8: Flushing caches..."
docker compose exec -T wordpress wp cache flush --allow-root || true
docker compose exec -T wordpress wp rewrite flush --allow-root || true

echo "Migration complete. Visit: ${NEW_URL}"
EOF
chmod +x scripts/sync-from-ec2.sh
8.2 Keeping the Pi in Sync Before Cutover
If you want to run the Pi in parallel for a while before cutting over DNS, use resync-from-ec2.sh to pull fresh content from EC2 at any time. Unlike the initial migration script it does not reinstall plugins or change the theme; it dumps and imports the database, rsyncs uploads and plugins incrementally, and flushes caches. It also takes a local backup of the Pi database before overwriting it. Pass --yes to skip the confirmation prompt for use in cron:
cat > scripts/resync-from-ec2.sh < "${BACKUP_DIR}/pre-resync_${TIMESTAMP}.sql.gz"
echo "  Saved: ${BACKUP_DIR}/pre-resync_${TIMESTAMP}.sql.gz"

echo "[2/6] Dumping database on EC2..."
OLD_URL=$($SSH_EC2 "cd ${EC2_WP_ROOT} && wp option get siteurl --allow-root 2>/dev/null" || echo "")
$SSH_EC2 "cd ${EC2_WP_ROOT} && wp db export /tmp/${DUMP_FILE} --allow-root"

echo "[3/6] Downloading and importing database..."
scp -i "${EC2_SSH_KEY}" -o StrictHostKeyChecking=no \
    "${EC2_USER}@${EC2_HOST}:/tmp/${DUMP_FILE}" "${LOCAL_DUMP}"
docker compose cp "${LOCAL_DUMP}" mariadb:/tmp/import.sql
docker compose exec -T mariadb sh -c \
    "mariadb -u${MYSQL_USER} -p${MYSQL_PASSWORD} ${MYSQL_DATABASE} /dev/null || true
docker compose exec -T nginx sh -c 'rm -rf /var/cache/nginx/fastcgi/*' 2>/dev/null || true
echo "Resync complete. Visit: ${NEW_URL}"
EOF
chmod +x scripts/resync-from-ec2.sh
To schedule weekly resyncs on the Pi, add to crontab (crontab -e):
0 2 * * 0 cd ~/your-project-dir && bash scripts/resync-from-ec2.sh --yes >> ~/logs/resync.log 2>&18.3 Verifying the Migration
Create the health check script and run it to confirm all services are responding correctly:
cat > scripts/health-check.sh </dev/null | grep -q ok \
    && echo "  Nginx: OK" || echo "  Nginx: FAIL"

echo "--- PHP-FPM ---"
docker compose exec -T wordpress curl -sf http://localhost/fpm-ping 2>/dev/null | grep -q pong \
    && echo "  PHP-FPM: OK" || echo "  PHP-FPM: (ping not exposed -- check container logs)"

echo "--- Redis ---"
REDIS_PONG=$(docker compose exec -T redis redis-cli -a "${REDIS_PASSWORD}" ping 2>/dev/null || echo "FAIL")
echo "  Redis: ${REDIS_PONG}"

echo "--- MariaDB ---"
DB_OK=$(docker compose exec -T mariadb \
    sh -c "mysqladmin -u${MYSQL_USER} -p${MYSQL_PASSWORD} ping 2>/dev/null" || echo "FAIL")
echo "  MariaDB: ${DB_OK}"

echo "--- WordPress HTTP ---"
HTTP_CODE=$(docker compose exec -T nginx \
    wget -qO- --server-response http://localhost/ 2>&1 | grep "HTTP/" | tail -1 | awk '{print $2}' || echo "ERR")
echo "  HTTP response: ${HTTP_CODE}"

echo "--- Disk Usage ---"
docker system df

echo "--- Memory ---"
free -h
EOF
chmod +x scripts/health-check.sh
Once the health check passes, open your Pi’s Cloudflare Tunnel URL in a browser. If the site loads correctly, update your Cloudflare DNS to point your production domain at the tunnel. Because Cloudflare controls both the DNS and the tunnel endpoint, the cutover propagates in under a minute.
9. Remote SSH Access: Getting Into Your Pi From Anywhere
Cloudflare Tunnel gets your site on the internet, but you also need a way to SSH into the Pi when you are not at home. The naive answer is port-forwarding port 22 on your router. Don’t. Exposed SSH ports attract constant brute-force attempts, and your Pi is now a production server worth protecting. There are two good alternatives.
9.1 Tailscale
Tailscale is a zero-config VPN built on WireGuard that creates a private mesh network between your devices. Your Pi gets a stable private IP (in the 100.x.x.x range) that is only reachable by devices you have authorised, with no port forwarding, no firewall rules, and it works even behind carrier-grade NAT.
Install Tailscale on the Pi:
curl -fsSL https://tailscale.com/install.sh | sh
sudo tailscale up
# Find the Pi's Tailscale IP:
tailscale ip -4
Install the Tailscale app on your Mac or iPhone, sign in to the same account, and SSH from anywhere:
9.2 Cloudflare Access SSH
Cloudflare Access SSH lets you reach the Pi from anywhere with no open ports, no VPN, and no static IP. Two ways to connect: via browser at https://ssh.your-domain.example.com, where you authenticate with Google or email OTP and get a terminal in the browser; or via CLI using ssh pi from your Mac, which works on LAN or remote and auto-detects which path to use.
How it works
Your Mac or browser
     |
     |  HTTPS (browser) or cloudflared ProxyCommand (CLI)
     v
Cloudflare Access -- authenticates you (email OTP or Google)
     |
     |  CF Tunnel (outbound-only from Pi, no inbound ports)
     v
cloudflared on Pi -- proxies to localhost:22
     |
     v
sshd -- validates a short-lived certificate issued by Cloudflare
Cloudflare issues a short-lived SSH certificate (valid for roughly 4 minutes) signed by the Access CA. The Pi’s sshd trusts that CA, so no passwords and no long-lived keys are needed for the remote path.
One-time setup
Run this once from your Mac while on the same LAN as the Pi. You need cloudflared installed (brew install cloudflared), an SSH key at ~/.ssh/pi_key with access to the Pi, and a credentials file at ~/Desktop/github/.cf-credentials containing CF_EMAIL, CF_KEY, CF_ZONE_ID, and CF_ACCOUNT_ID.
Create the script on your Mac and run it:
cat > scripts/setup-cf-ssh.sh </dev/null || { echo "ERROR: cloudflared not found -- brew install cloudflared"; exit 1; }
[ -f "${SSH_KEY}" ]                || { echo "ERROR: SSH key not found: ${SSH_KEY}"; exit 1; }

echo "Step 1: Checking Pi is reachable on LAN..."
ssh ${SSH_OPTS} -o BatchMode=yes "${PI_USER}@${PI_HOST}" "echo ok" &>/dev/null \
    || { echo "ERROR: Cannot reach Pi. Must be on LAN for initial setup."; exit 1; }

echo "Step 2: Adding SSH ingress to tunnel config..."
grep -q "${SSH_HOSTNAME}" "${CF_CONFIG}" || \
    sed -i '' "s|  # Catch-all|  - hostname: ${SSH_HOSTNAME}\n    service: ssh://localhost:22\n\n  # Catch-all|" "${CF_CONFIG}"

echo "Step 3: Adding DNS CNAME..."
ssh ${SSH_OPTS} "${PI_USER}@${PI_HOST}" \
    "cloudflared tunnel route dns ${TUNNEL_NAME} ${SSH_HOSTNAME} 2>&1 || true"

echo "Step 4: Creating Cloudflare Access application..."
EXISTING_APP=$(curl -s \
    "https://api.cloudflare.com/client/v4/accounts/${CF_ACCOUNT_ID}/access/apps" \
    -H "X-Auth-Email: ${CF_EMAIL}" -H "X-Auth-Key: ${CF_KEY}" \
    | python3 -c "
import sys, json
apps = json.load(sys.stdin).get('result', [])
print(next((a['id'] for a in apps if a.get('domain') == '${SSH_HOSTNAME}'), ''))
" 2>/dev/null || true)

if [ -n "${EXISTING_APP}" ]; then
    APP_ID="${EXISTING_APP}"
else
    APP_RESPONSE=$(curl -s -X POST \
        "https://api.cloudflare.com/client/v4/accounts/${CF_ACCOUNT_ID}/access/apps" \
        -H "X-Auth-Email: ${CF_EMAIL}" -H "X-Auth-Key: ${CF_KEY}" \
        -H "Content-Type: application/json" \
        --data "{\"name\":\"Pi SSH\",\"type\":\"ssh\",\"domain\":\"${SSH_HOSTNAME}\",\"session_duration\":\"24h\"}")
    APP_ID=$(echo "${APP_RESPONSE}" | python3 -c "import sys,json; print(json.load(sys.stdin)['result']['id'])")
fi

echo "Step 5: Creating Access policy..."
curl -s -X POST \
    "https://api.cloudflare.com/client/v4/accounts/${CF_ACCOUNT_ID}/access/apps/${APP_ID}/policies" \
    -H "X-Auth-Email: ${CF_EMAIL}" -H "X-Auth-Key: ${CF_KEY}" \
    -H "Content-Type: application/json" \
    --data "{\"name\":\"Owner only\",\"decision\":\"allow\",\"precedence\":1,\"include\":[{\"email\":{\"email\":\"${ALLOWED_EMAIL}\"}}]}" \
    > /dev/null

echo "Step 6: Fetching Cloudflare SSH CAs..."
GATEWAY_CA=$(curl -s -X POST \
    "https://api.cloudflare.com/client/v4/accounts/${CF_ACCOUNT_ID}/access/gateway_ca" \
    -H "X-Auth-Email: ${CF_EMAIL}" -H "X-Auth-Key: ${CF_KEY}" \
    | python3 -c "import sys,json; print(json.load(sys.stdin)['result']['public_key'])" 2>/dev/null)
SLC_CA=$(curl -s -X POST \
    "https://api.cloudflare.com/client/v4/accounts/${CF_ACCOUNT_ID}/access/apps/${APP_ID}/ca" \
    -H "X-Auth-Email: ${CF_EMAIL}" -H "X-Auth-Key: ${CF_KEY}" \
    | python3 -c "import sys,json; print(json.load(sys.stdin)['result']['public_key'])" 2>/dev/null)
[ -n "${GATEWAY_CA}" ] || { echo "ERROR: Failed to fetch gateway CA"; exit 1; }
[ -n "${SLC_CA}" ]     || { echo "ERROR: Failed to fetch short-lived cert CA"; exit 1; }

echo "Step 7: Configuring sshd and creating CF Linux user on Pi..."
ssh ${SSH_OPTS} "${PI_USER}@${PI_HOST}" "
    echo '${GATEWAY_CA}' | sudo tee /etc/ssh/cloudflare-access-ca.pub > /dev/null
    echo '${SLC_CA}'     | sudo tee /etc/ssh/cloudflare-slc-ca.pub    > /dev/null
    sudo bash -c 'cat /etc/ssh/cloudflare-access-ca.pub /etc/ssh/cloudflare-slc-ca.pub \
        > /etc/ssh/cloudflare-ca-combined.pub'
    sudo sed -i '/TrustedUserCAKeys/d' /etc/ssh/sshd_config
    echo 'TrustedUserCAKeys /etc/ssh/cloudflare-ca-combined.pub' \
        | sudo tee -a /etc/ssh/sshd_config > /dev/null
    sudo mkdir -p /etc/ssh/auth_principals
    grep -q '^AuthorizedPrincipalsFile' /etc/ssh/sshd_config \
        || echo 'AuthorizedPrincipalsFile /etc/ssh/auth_principals/%u' \
           | sudo tee -a /etc/ssh/sshd_config > /dev/null
    id '${CF_SSH_USER}' &>/dev/null || sudo useradd \
        --no-create-home --home-dir /home/${PI_USER} --shell /bin/bash '${CF_SSH_USER}'
    sudo chmod 750 /home/${PI_USER}
    sudo usermod -aG ${PI_USER} '${CF_SSH_USER}'
    printf '${CF_SSH_USER}\n${ALLOWED_EMAIL}\n' \
        | sudo tee /etc/ssh/auth_principals/${CF_SSH_USER} > /dev/null
    sudo systemctl reload ssh
"

echo "Step 8: Pushing tunnel config and restarting cloudflared..."
scp ${SSH_OPTS} "${CF_CONFIG}" "${PI_USER}@${PI_HOST}:/tmp/cloudflared-config.yml"
ssh ${SSH_OPTS} "${PI_USER}@${PI_HOST}" "
    sudo mv /tmp/cloudflared-config.yml /etc/cloudflared/config.yml
    sudo systemctl restart cloudflared
    sleep 2
    systemctl is-active cloudflared
"

echo "Step 9: Authenticating with Cloudflare Access (opens browser)..."
cloudflared access login "https://${SSH_HOSTNAME}"

echo "Step 10: Testing SSH connection end-to-end..."
cloudflared access ssh-gen --hostname "${SSH_HOSTNAME}"
CF_KEY_FILE="${HOME}/.cloudflared/${SSH_HOSTNAME}-cf_key"
ssh \
    -i "${CF_KEY_FILE}" \
    -o "ProxyCommand=cloudflared access ssh --hostname ${SSH_HOSTNAME}" \
    -o StrictHostKeyChecking=no \
    -o ConnectTimeout=15 \
    "${CF_SSH_USER}@${SSH_HOSTNAME}" "echo 'Connected as: \$(whoami)'"

echo "Step 11: Writing ~/.ssh/config entry..."
grep -q "Host pi$" "${HOME}/.ssh/config" 2>/dev/null || cat >> "${HOME}/.ssh/config" << SSHEOF

Host pi
    HostName ${SSH_HOSTNAME}
    User ${CF_SSH_USER}
    IdentityFile ${HOME}/.cloudflared/${SSH_HOSTNAME}-cf_key
    ProxyCommand cloudflared access ssh --hostname %h
    StrictHostKeyChecking no
SSHEOF

echo "Setup complete. Connect with: cloudflared access ssh-gen --hostname ${SSH_HOSTNAME} && ssh pi"
EOF
chmod +x scripts/setup-cf-ssh.sh
Connecting
Browser SSH: go to https://ssh.your-domain.example.com, enter your email, paste the OTP, and a terminal opens in the browser.
CLI: short-lived certs expire after roughly 4 minutes, so regenerate one before each session:
cloudflared access ssh-gen --hostname ssh.your-domain.example.com && ssh piIf the Access token itself has expired (24-hour TTL), refresh it first:
cloudflared access login https://ssh.your-domain.example.com
cloudflared access ssh-gen --hostname ssh.your-domain.example.com && ssh pi
All deploy scripts auto-detect whether you are on the home network or remote:
if ssh -i ~/.ssh/pi_key -o ConnectTimeout=4 -o BatchMode=yes [email protected] exit 2>/dev/null; then
    # on LAN -- direct connection
else
    cloudflared access ssh-gen --hostname ssh.your-domain.example.com
    # CF tunnel -- short-lived cert
fi
Reference: files on the Pi
| Path | Purpose |
|---|---|
/etc/ssh/cloudflare-access-ca.pub | Cloudflare gateway CA public key |
/etc/ssh/cloudflare-slc-ca.pub | Short-lived cert CA public key |
/etc/ssh/cloudflare-ca-combined.pub | Both CAs combined; TrustedUserCAKeys points here |
/etc/ssh/auth_principals/your.username | Maps cert principal to Linux user |
/etc/cloudflared/config.yml | Tunnel config with SSH ingress rule |
Additions to /etc/ssh/sshd_config:
TrustedUserCAKeys /etc/ssh/cloudflare-ca-combined.pub
AuthorizedPrincipalsFile /etc/ssh/auth_principals/%u
Refresh cheatsheet:
# Regenerate short-lived cert before each session
cloudflared access ssh-gen --hostname ssh.your-domain.example.com

# Refresh 24h Access token after it expires
cloudflared access login https://ssh.your-domain.example.com
10. Cost Comparison: EC2 T4g Instances vs Raspberry Pi
This is where the economics become very clear. The following table shows AWS EC2 on-demand pricing for t4g instances in af-south-1 (Cape Town), which is typically 25 to 30 percent more expensive than us-east-1 due to the smaller regional footprint and higher local operating costs.
| Instance | vCPUs | RAM | Approx. monthly cost (af-south-1) | Approx. annual cost |
|---|---|---|---|---|
| t4g.micro | 2 | 1 GiB | ~$9 | ~$108 |
| t4g.small | 2 | 2 GiB | ~$18 | ~$216 |
| t4g.medium | 2 | 4 GiB | ~$36 | ~$432 |
These figures cover compute only. A realistic WordPress deployment on EC2 adds roughly $5 to $8 per month for a 30 GB gp3 EBS volume, $3 to $5 per month for a static Elastic IP, and variable data transfer costs. A t4g.small deployment in Cape Town with 30 GB of storage and modest traffic realistically costs between R450 and R550 per month all in.
The Raspberry Pi 5 setup has the following one-time hardware costs:
| Component | Approximate cost (USD) |
|---|---|
| Raspberry Pi 5 8 GB | $145 |
| Official M.2 HAT+ | $12 |
| 256 GB NVMe SSD (2230 form factor, e.g. WD SN520) | $28 |
| Official 27W USB-C power supply | $12 |
| Case (official or Argon NEO 5 M.2) | $12 |
| 32 GB microSD (boot recovery) | $8 |
| Total | ~$217 |
The ongoing running cost for electricity is negligible. At an average draw of 3.5 watts over 24 hours the Pi consumes about 30.7 kWh per year. At South Africa’s 2026 residential rate of approximately R3.91 per kWh, that comes to about R120 per year, roughly R10 per month, or less than $6 USD annually.
| First year total (USD) | Subsequent years (USD) | |
|---|---|---|
| EC2 t4g.small (af-south-1, incl. storage) | ~$270 | ~$270 |
| EC2 t4g.medium (af-south-1, incl. storage) | ~$510 | ~$510 |
| Raspberry Pi 5 setup | ~$223 ($217 hardware + $6 electricity) | ~$6 |
The Pi 5 pays for itself versus a t4g.small in under ten months. Every year after that you are saving the full $260 or more. Versus a t4g.medium, the payback period is under six months.
It is worth being honest about the trade-offs. EC2 gives you guaranteed uptime SLAs that a Pi sitting in your study cannot match. A power outage, a router restart, or a failed NVMe drive will take your site offline. If your site generates revenue or has strict uptime requirements, these are real costs that deserve a place in the comparison. For a personal blog or portfolio site, a few hours of downtime per year during a power outage is an acceptable trade-off for saving over $250 annually.
11. Security: What Cloudflare’s Free Tier Actually Gives You
This is the part of the self-hosting story that surprises people. The conventional wisdom is that moving off a managed cloud provider means accepting reduced security. In practice, adding Cloudflare in front of a self-hosted site gives you a security posture that compares favourably to a basic EC2 deployment with a standard security group.
11.1 What AWS gives you on a basic EC2 deployment
A standard EC2 instance comes with Security Groups (Layer 3/4 only), Shield Standard (no application-layer coverage), and the option to upgrade to Shield Advanced at $3,000 per month, which is not realistic for any workload at this scale. AWS WAF is available on a pay-per-use basis at roughly $15 per month extra, and Certificate Manager only works with an ALB or CloudFront rather than a raw EC2 instance. When you tally it all up, a properly secured t4g.small in Cape Town runs to roughly $59 per month all in.
11.2 What Cloudflare’s free tier gives you
DDoS mitigation on the free tier is unmetered. Cloudflare’s network absorbs attack traffic at the edge before it reaches your infrastructure, with no limit on the scale of attack the free tier will handle. This is meaningfully better than the default EC2 experience, where a volumetric attack will saturate your instance’s network bandwidth and push your monthly data transfer bill into unexpected territory.
The Web Application Firewall on the free tier provides five managed rules covering the most common OWASP attack categories including SQL injection, cross-site scripting, and remote code execution attempts. For a WordPress site these rules catch the vast majority of automated scanning and exploit attempts.
Rate limiting on the free tier became unmetered in October 2022. You can configure rules to block IP addresses that exceed request thresholds, which is particularly useful for protecting the WordPress login endpoint and the xmlrpc endpoint from brute-force attacks.
Bot Fight Mode challenges requests from known bot infrastructure before they reach your server, reducing the load that automated scanners and crawlers place on your Pi.
SSL/TLS certificates are issued and renewed automatically. Traffic between visitors and Cloudflare’s edge is encrypted with a certificate Cloudflare manages. Traffic between Cloudflare’s edge and the Pi travels through the tunnel, which is also TLS-encrypted end to end. The Pi itself never needs a certificate and never exposes a port to the internet.
The CDN caches static assets at Cloudflare’s 300+ edge locations. For a South African site serving international readers this is a meaningful latency improvement.
11.3 The honest comparison
| Capability | Basic EC2 | Properly Secured EC2 | Cloudflare Free |
|---|---|---|---|
| Network-layer DDoS protection | Yes (Shield Standard) | Yes (Shield Standard) | Yes (included) |
| Application-layer DDoS protection | No | Yes (AWS WAF + ALB) | Yes (unmetered) |
| WAF (OWASP ruleset) | No | Yes (AWS WAF) | Yes (5 managed rules) |
| Rate limiting | No | Yes (AWS WAF rules) | Yes (unmetered) |
| Bot mitigation | No | Partial (WAF rules) | Yes (Bot Fight Mode) |
| Automatic TLS | No (ACM not available on raw EC2) | Yes (ACM via ALB) | Yes (included) |
| Origin IP concealment | No | No | Yes (IP never in DNS) |
| Monthly cost delta | $0 | +~$34/month | $0 |
To match what Cloudflare gives you for free, you would need to add AWS WAF plus an ALB at roughly $34 per month extra, enough to buy a new Pi 5 every two months. You are not levelling the security playing field by adding Cloudflare. You are raising it, and you are doing it for free.
11.4 What Cloudflare does not cover
Cloudflare does not prevent a compromised plugin from doing damage inside your WordPress installation. Keep WordPress core, themes, and plugins updated. Use strong passwords and two-factor authentication on the WordPress admin and on SSH access to the Pi. Cloudflare is a perimeter defence, not a substitute for application security.
12. What You Give Up: AMI Snapshots and Instance Recovery
The honest answer to what you lose by leaving EC2 is primarily the AWS backup and recovery ecosystem. EC2 AMI snapshots are one of the most useful features of the platform for exactly this kind of deployment. An AMI is a complete, bootable image of your instance at a point in time. If your EBS volume becomes corrupted, if you make a configuration change that breaks the stack, or if you want to test a major WordPress version upgrade, you can restore a known-good AMI and be running in minutes.
You also lose instance resize flexibility. If your site suddenly needs more RAM or CPU, you can stop a t4g.small and restart it as a t4g.medium with no data migration. On the Pi your hardware is fixed until you buy new hardware.
Multi-AZ resilience is another real difference. An EC2 instance running in af-south-1 can be configured to fail over to another availability zone automatically. A Pi at home cannot replicate this topology without significant effort.
For the level of deployment this guide describes, these trade-offs are manageable. The AMI snapshot capability is replaced by S3 backups, which the next section covers in detail. The resizing flexibility is replaced by the Pi’s headroom: an 8 GB Pi running a modest WordPress site has enough memory to absorb significant traffic growth before the hardware becomes the constraint.
13. S3 Backups: Nightly Snapshots and Full Disaster Recovery
The backup strategy for the Pi mirrors what AWS Backup does with AMIs, but at the application layer. Every night at 3 AM a cron job runs backup-to-s3.sh, which creates five archives and uploads them to S3: a gzipped SQL dump of the WordPress database, a tarball of wp-content/uploads, a tarball of wp-content/themes, a tarball of key OS configuration files, and a tarball of the stack config (docker-compose.yml, php.ini, and nginx config). The script keeps the 60 most recent daily backups and sets an S3 lifecycle policy as a safety net that deletes objects older than 65 days.
Create the script on the Pi, run it once with --setup to create the S3 lifecycle policy, then run it again to confirm the first backup completes successfully before relying on cron:
cat > scripts/backup-to-s3.sh < "${DB_FILE}"
log "  DB dump: $(du -sh "${DB_FILE}" | cut -f1)"

log "Step 2: Archiving wp-content/uploads..."
UPLOADS_FILE="${TMP_DIR}/uploads-${TIMESTAMP}.tar.gz"
docker compose exec -T wordpress tar -czf - -C /var/www/html/wp-content uploads \
    2>/dev/null > "${UPLOADS_FILE}"
log "  Uploads: $(du -sh "${UPLOADS_FILE}" | cut -f1)"

log "Step 3: Archiving wp-content/themes..."
THEMES_FILE="${TMP_DIR}/themes-${TIMESTAMP}.tar.gz"
docker compose exec -T wordpress tar -czf - -C /var/www/html/wp-content themes \
    2>/dev/null > "${THEMES_FILE}"
log "  Themes: $(du -sh "${THEMES_FILE}" | cut -f1)"

log "Step 4: Archiving OS config..."
OS_CONFIG_FILE="${TMP_DIR}/os-config-${TIMESTAMP}.tar.gz"
sudo tar -czf "${OS_CONFIG_FILE}" --ignore-failed-read \
    /etc/fstab \
    /etc/docker/daemon.json \
    /boot/firmware/config.txt \
    /etc/systemd/journald.conf.d/volatile.conf \
    /etc/systemd/system.conf.d/watchdog.conf \
    2>/dev/null || true
sudo chown "$(id -u):$(id -g)" "${OS_CONFIG_FILE}"
log "  OS config: $(du -sh "${OS_CONFIG_FILE}" | cut -f1)"

log "Step 5: Archiving stack config..."
STACK_CONFIG_FILE="${TMP_DIR}/stack-config-${TIMESTAMP}.tar.gz"
tar -czf "${STACK_CONFIG_FILE}" --ignore-failed-read \
    -C "${REPO_ROOT}" \
    docker-compose.yml .env php/php.ini php/www.conf nginx/ \
    2>/dev/null || true
log "  Stack config: $(du -sh "${STACK_CONFIG_FILE}" | cut -f1)"

log "Step 6: Uploading to S3..."
S3_PATH="s3://${S3_BUCKET}/${S3_PREFIX}/${DATE}"
aws s3 cp "${DB_FILE}"           "${S3_PATH}/db-${TIMESTAMP}.sql.gz"           --storage-class STANDARD_IA
aws s3 cp "${UPLOADS_FILE}"      "${S3_PATH}/uploads-${TIMESTAMP}.tar.gz"      --storage-class STANDARD_IA
aws s3 cp "${THEMES_FILE}"       "${S3_PATH}/themes-${TIMESTAMP}.tar.gz"       --storage-class STANDARD_IA
aws s3 cp "${OS_CONFIG_FILE}"    "${S3_PATH}/os-config-${TIMESTAMP}.tar.gz"    --storage-class STANDARD_IA
aws s3 cp "${STACK_CONFIG_FILE}" "${S3_PATH}/stack-config-${TIMESTAMP}.tar.gz" --storage-class STANDARD_IA
log "  Uploaded."

log "Step 7: Verifying upload..."
aws s3 ls "${S3_PATH}/" | while read -r line; do log "  $line"; done

log "Step 8: Pruning old backups (keeping ${MAX_BACKUPS})..."
BACKUP_DATES=$(aws s3 ls "s3://${S3_BUCKET}/${S3_PREFIX}/" \
    | grep PRE | awk '{print $2}' | tr -d '/' | sort)
TOTAL=$(echo "${BACKUP_DATES}" | grep -c . || true)
log "  Total backups: ${TOTAL}"
if [[ "${TOTAL}" -gt "${MAX_BACKUPS}" ]]; then
    DELETE_COUNT=$(( TOTAL - MAX_BACKUPS ))
    echo "${BACKUP_DATES}" | head -"${DELETE_COUNT}" | while IFS= read -r old_date; do
        log "  Deleting: ${old_date}"
        aws s3 rm "s3://${S3_BUCKET}/${S3_PREFIX}/${old_date}/" --recursive
    done
    log "  Pruned ${DELETE_COUNT} backup(s)."
else
    log "  No pruning needed."
fi
EOF
chmod +x scripts/backup-to-s3.sh
13.1 Restoring on a Clean Pi
This is the disaster recovery scenario: the NVMe drive failed, you have a new Pi, and you want the site back up.
Step 1. Flash a new SD card or NVMe drive with Raspberry Pi OS Lite 64-bit.
Step 2. Install Docker CE, Git, the AWS CLI, and Python 3.
Step 3. Clone your project repo and copy your .env file across. The .env file is the only thing not in S3, so keep a copy somewhere safe.
Step 4. Bring up the stack: bash scripts/deploy.sh
Step 5. Create the restore script and run it. With no arguments it fetches the most recent backup; optionally pass a date:
cat > scripts/restore-from-s3.sh </dev/null | tail -1)
UPLOADS_FILE=$(ls "${TMP_DIR}"/uploads-*.tar.gz 2>/dev/null | tail -1)
THEMES_FILE=$(ls "${TMP_DIR}"/themes-*.tar.gz 2>/dev/null | tail -1)
STACK_CONFIG_FILE=$(ls "${TMP_DIR}"/stack-config-*.tar.gz 2>/dev/null | tail -1)
[[ -z "${DB_FILE}" ]] && { log "ERROR: No DB dump found"; exit 1; }

echo ""
echo "WARNING: This will OVERWRITE the current database and files."
echo "  DB:           ${DB_FILE}"
echo "  Uploads:      ${UPLOADS_FILE:-not found}"
echo "  Themes:       ${THEMES_FILE:-not found}"
echo "  Stack config: ${STACK_CONFIG_FILE:-not found}"
read -r -p "Continue? [y/N] " confirm
[[ "${confirm,,}" == "y" ]] || { echo "Aborted."; exit 0; }

source .env

log "Step 1: Restoring database..."
gunzip -c "${DB_FILE}" | docker compose exec -T mariadb sh -c \
    "mariadb -u${MYSQL_USER} -p${MYSQL_PASSWORD} ${MYSQL_DATABASE}"

if [[ -n "${UPLOADS_FILE:-}" ]]; then
    log "Step 2: Restoring uploads..."
    docker compose exec -T wordpress rm -rf /var/www/html/wp-content/uploads
    cat "${UPLOADS_FILE}" | docker compose exec -T -u root wordpress tar -xzf - \
        -C /var/www/html/wp-content
    docker compose exec -T -u root wordpress chown -R www-data:www-data \
        /var/www/html/wp-content/uploads
fi

if [[ -n "${THEMES_FILE:-}" ]]; then
    log "Step 3: Restoring themes..."
    cat "${THEMES_FILE}" | docker compose exec -T -u root wordpress tar -xzf - \
        -C /var/www/html/wp-content
    docker compose exec -T -u root wordpress chown -R www-data:www-data \
        /var/www/html/wp-content/themes
fi

if [[ -n "${STACK_CONFIG_FILE:-}" ]]; then
    log "Step 4: Restoring stack config..."
    tar -xzf "${STACK_CONFIG_FILE}" -C "${REPO_ROOT}" 2>/dev/null || true
    log "  Run 'docker compose up -d' to apply any config changes."
fi

log "Step 5: Flushing caches..."
docker compose exec -T -u root wordpress wp cache flush --allow-root 2>/dev/null || true
docker compose exec -T nginx sh -c 'rm -rf /var/cache/nginx/fastcgi/*' 2>/dev/null || true

log "Step 6: Smoke test..."
sleep 3
STATUS=$(curl -so /dev/null -w "%{http_code}" http://localhost:8082/)
SIZE=$(curl -s http://localhost:8082/ | wc -c)
log "Homepage: HTTP ${STATUS}, ${SIZE} bytes"

log "Restore complete from ${TARGET_DATE}."
log "Visit: $(docker compose exec -T -u root wordpress wp option get siteurl --allow-root 2>/dev/null)"
EOF
chmod +x scripts/restore-from-s3.sh
From a completely clean Pi, with a fast home internet connection for the S3 download, the full restore runs in under fifteen minutes. That is comparable to restoring from an EC2 AMI snapshot.
13.2 Setting Up the Cron Job
Add the following to the Pi’s crontab (crontab -e) to run the backup daily at 3 AM:
0 3 * * * cd ~/your-project-dir && bash scripts/backup-to-s3.sh >> /var/log/wp-backup.log 2>&1To verify the backup ran correctly:
tail -50 /var/log/wp-backup.log
aws s3 ls s3://your-bucket-name/wordpress-pi-nightly/ --recursive --human-readable
13.3 Weekly Automated Updates
Create the update script on the Pi and add it to cron to run every Sunday at 3 AM. It pulls the latest Docker images, recreates containers, updates WordPress core and all plugins and themes, flushes caches, and runs a smoke test:
cat > scripts/update.sh <&1 | grep -E 'Pull|up to date|Pulled' || true

log "Step 2: Recreating containers..."
docker compose up -d --remove-orphans
sleep 15

log "Step 3: Installing WP-CLI..."
docker compose exec -T -u root wordpress sh -c '
    if ! command -v wp &>/dev/null; then
        curl -sO https://raw.githubusercontent.com/wp-cli/builds/gh-pages/phar/wp-cli.phar &&
        chmod +x wp-cli.phar && mv wp-cli.phar /usr/local/bin/wp
    fi
    echo "WP-CLI: $(wp --version --allow-root)"
' 2>/dev/null

log "Step 4: Updating WordPress core..."
docker compose exec -T -u root wordpress wp core update --allow-root 2>&1 | tail -2 || true
docker compose exec -T -u root wordpress wp core update-db --allow-root 2>&1 | tail -1 || true

log "Step 5: Updating plugins..."
docker compose exec -T -u root wordpress wp plugin update --all --allow-root 2>&1 | tail -5 || true

log "Step 6: Updating themes..."
docker compose exec -T -u root wordpress wp theme update --all --allow-root 2>&1 | tail -3 || true

log "Step 7: Flushing caches..."
docker compose exec -T -u root wordpress wp cache flush --allow-root 2>/dev/null || true
docker compose exec -T nginx sh -c 'rm -rf /var/cache/nginx/fastcgi/*' 2>/dev/null || true

log "Step 8: Smoke test..."
STATUS=$(curl -so /dev/null -w "%{http_code}" http://localhost:8082/)
SIZE=$(curl -s http://localhost:8082/ | wc -c)
log "Homepage: HTTP ${STATUS}, ${SIZE} bytes"
if [[ "${STATUS}" != "200" ]] || [[ "${SIZE}" -lt 10000 ]]; then
    log "ERROR: Homepage check failed -- investigate before declaring update successful"
    exit 1
fi

log "Update complete."
EOF
chmod +x scripts/update.sh
Add to crontab:
0 3 * * 0 cd ~/your-project-dir && bash scripts/update.sh --yes >> /var/log/wp-update.log 2>&114. The Complete Hardware Shopping List
For the best setup (Pi 5 with NVMe): Raspberry Pi 5 8 GB ($145), the official Raspberry Pi M.2 HAT+ ($12), a WD SN520 or Samsung PM991A NVMe 2230 256 GB ($25 to $35), the official Raspberry Pi 27W USB-C power supply ($12), a case that accommodates the HAT+ such as the Argon NEO 5 M.2 ($25) or the official active cooler case ($10 plus $5 for the cooler), and a 32 GB Samsung Pro Endurance microSD for boot recovery ($12). Total hardware outlay: approximately $217 to $230 USD depending on your case choice.
For the Pi 4B with USB-attached SSD (budget option): Raspberry Pi 4B 8 GB ($135), a USB 3.0 to M.2 NVMe enclosure ($15), a 256 GB NVMe SSD ($25 to $35), the official Pi 4 USB-C power supply ($10), any case with airflow ($8 to $15), and a 32 GB Samsung Pro Endurance microSD ($12). Total: approximately $205 to $225 USD.
If you already have a Pi 4B and want to start immediately with SD card only: use a Samsung Pro Endurance or SanDisk MAX Endurance 64 GB or 128 GB card. Buy the NVMe upgrade once you have validated the setup. Running MariaDB on a quality A2 card is workable; it is just not as fast. The rest of the guide applies identically.
15. The Real-World Experience
The Pi 5 running this stack has been handling andrewbaker.ninja’s traffic for several months. Page generation time for an uncached request, measured from inside the network, is consistently under 200ms. With Nginx FastCGI caching enabled, the same pages serve in under 10ms. Cloudflare’s CDN layer means most international visitors never reach the Pi at all for static assets.
The Pi has survived load spikes when articles were picked up by aggregators. During one episode that pushed several hundred concurrent requests, the Pi’s memory usage climbed to around 5 GB and CPU peaked at around 60 percent. It did not go over. It served every request. A t4g.small with 2 GiB of RAM would have started swapping aggressively in the same situation.
The nightly S3 backup has run without a single failure. The most recent restore test, done as a drill on a spare Pi, completed in eleven minutes from a clean OS install to a fully functional site. The electricity cost for the last three months, calculated from the Pi’s measured average draw of 3.2 watts, has been approximately R35 total. The AWS bill for the same period would have been approximately R1,650.
16. Conclusion
Moving a WordPress site from EC2 to a Raspberry Pi 5 is a project that takes an afternoon to set up and pays for itself in under ten months. The scripts in this guide reduce the migration itself to a single command. The S3 backup and restore scripts give you a disaster recovery capability that is genuinely comparable to what AWS Backup provides with AMI snapshots. Cloudflare’s free tier, paired with the tunnel approach, provides better DDoS protection and WAF coverage than a basic EC2 security group with no additional configuration.
The Pi 5 with NVMe storage is a capable server. The architecture choices that make it work well, running a full Docker Compose stack with Nginx FastCGI caching, Redis object caching, and MariaDB tuned for low-memory environments, are the same choices you would make for any low-to-medium traffic WordPress deployment. Nothing here is Pi-specific beyond the ARM64 image tags.
If you are paying for a t4g.small or larger instance to run a site that does not need guaranteed SLAs or on-demand scalability, this migration is worth doing. The hardware pays for itself, the maintenance overhead is lower than you might expect, and there is a certain satisfaction in serving your own site from hardware you own.